Getting Started
Thank you for purchasing our Theme! Welcome to ThePRO User Guide. In this file, you’ll find how to set up, use, and customize your brand-new WordPress theme. I hope this documentation will help you to build your next amazing website smoothly.
Let’s get started!
Theme Requirements
Before you install the theme, please make sure your hosting provider is running the following software:
- WordPress 6.0 or higher
- PHP 7.4 or greater
- MySQL 5.6 or greater
Recommended PHP Limits
Many issues you may encounter, such as demo content fails when importing, white screen, empty page content, theme not being saved, and other similar issues are all related to low PHP configuration limits. The solution is to increase the PHP limits. You can do this on your own, or contact your hosting provider and ask them to increase those limits to a minimum of the following:
- PHP time limit
(max_execution_time) 120 - PHP memory limit
(memory_limit) 512M - PHP max input variable
(max_input_vars) 1000 - Upload max filesize
(upload_max_filesize) 30M
You can check your PHP configuration limits from your WordPress dashboard. Go to Tools → Site Health, open the Info tab, and expand the Server section. There you will find the current PHP limits set by your web hosting provider.
Theme installation
To install our WordPress theme:
- Log in to your ThemeREC Account page.
- Go to the “Downloads” tab.
- Click “Download” button next to the ThePRO theme to download the thepro.zip file.
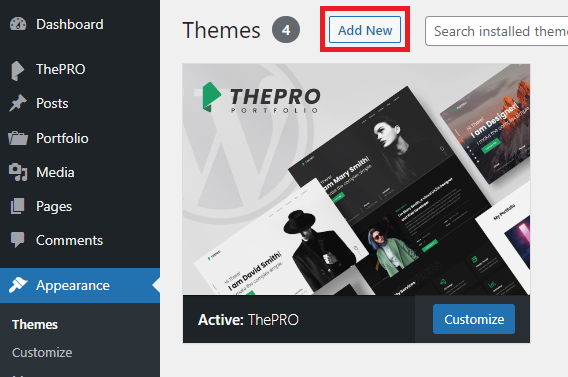
- Navigate to WordPress dashboard → Appearance → Themes, and click the “Add New” button at the top.
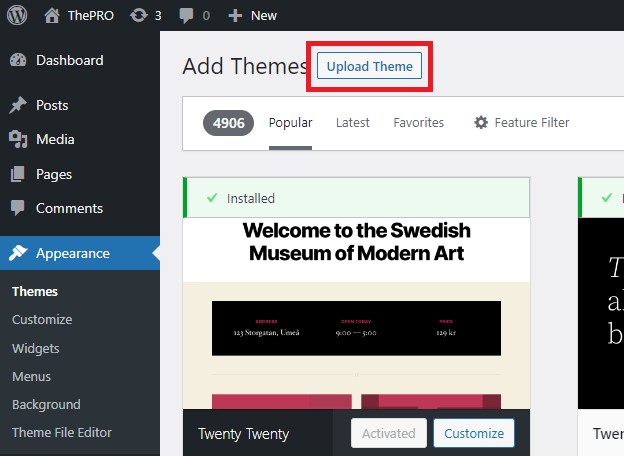
- Click the “Upload Theme” button.
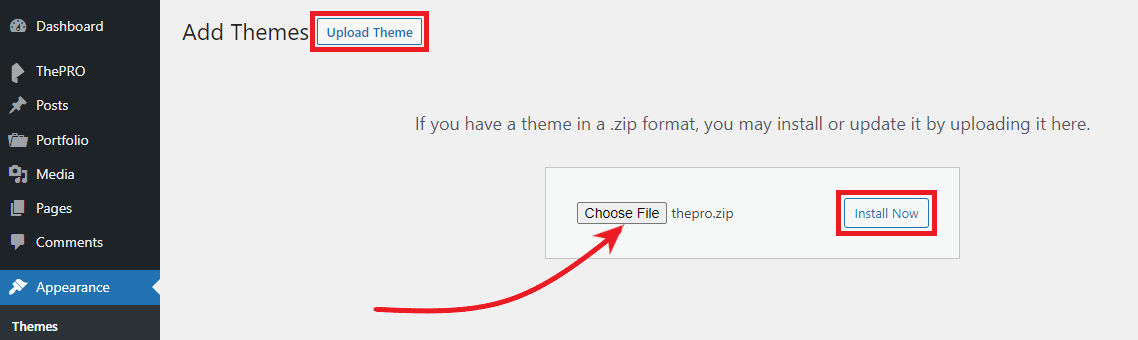
- Click Choose File, then select the thepro.zip file you just downloaded, and click on Install Now.
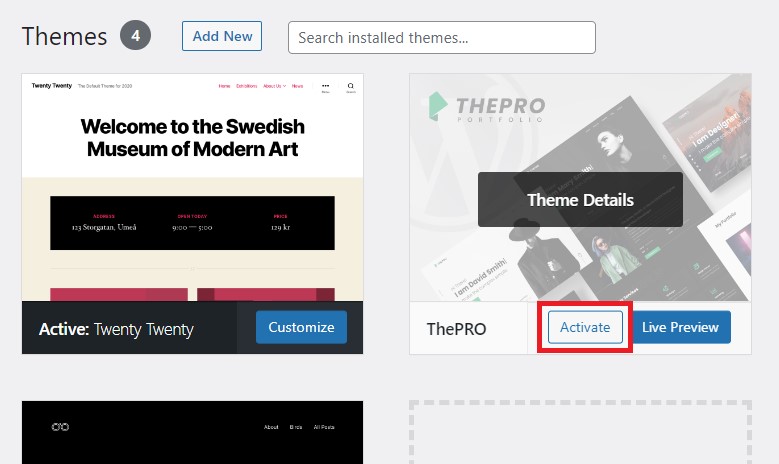
- Once complete, click on the “Activate” link.
Plugins Installation
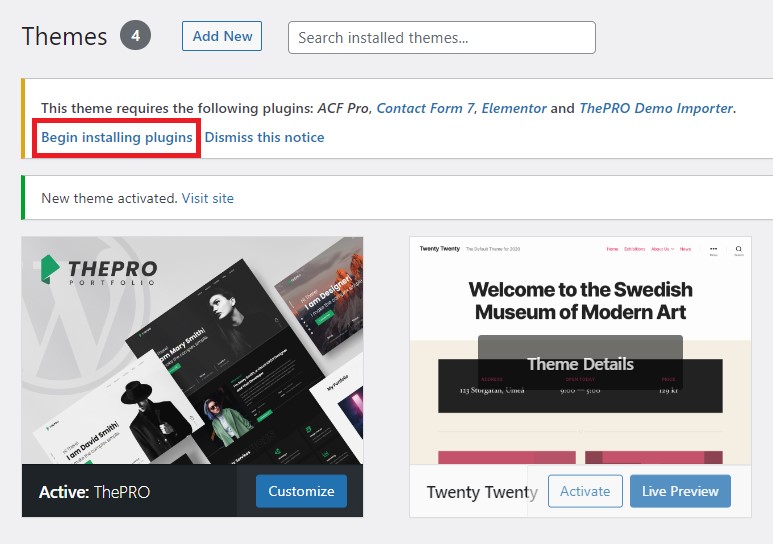
Once you have installed and activated the theme, you will be prompted to install required plugins for all theme features.
- Click the link to “Begin installing plugins”.
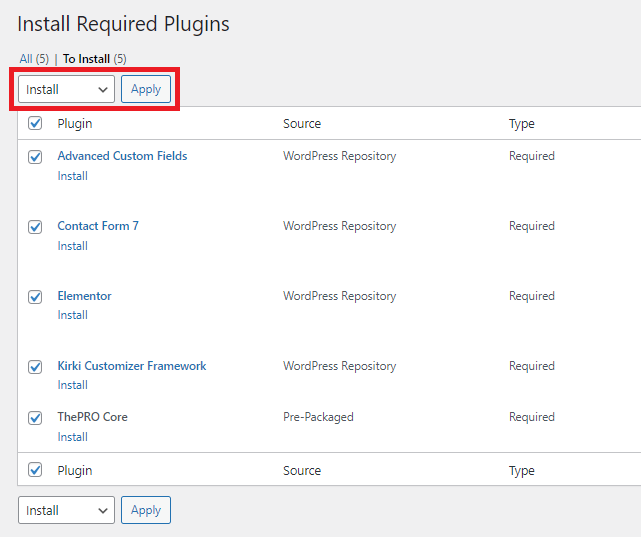
- Check all the required plugins, select “Install”, and click the “Apply” button.
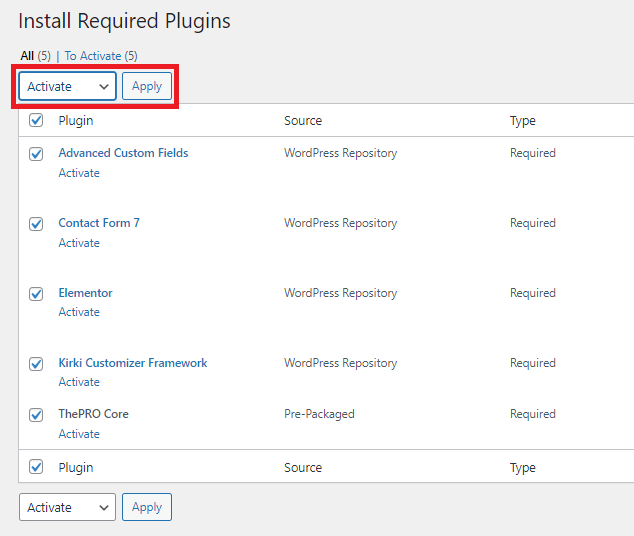
- Once all plugins are installed (you should see a success message for each), return to the plugin installation page (or go to Plugins → Installed Plugins).
- Check all the required plugins again, select “Activate”, and click the “Apply” button.
Import Demo Content
Our theme includes a simple One-click demo content import (pages, blog posts, etc.), which allows your site to look exactly as on the theme demo.
To import demo content:
- Open your WordPress admin dashboard, navigate to ThePRO → Demo Import
- Choose the demo you want to import and click on the “Import” button. The import may take some time (up to a few minutes)
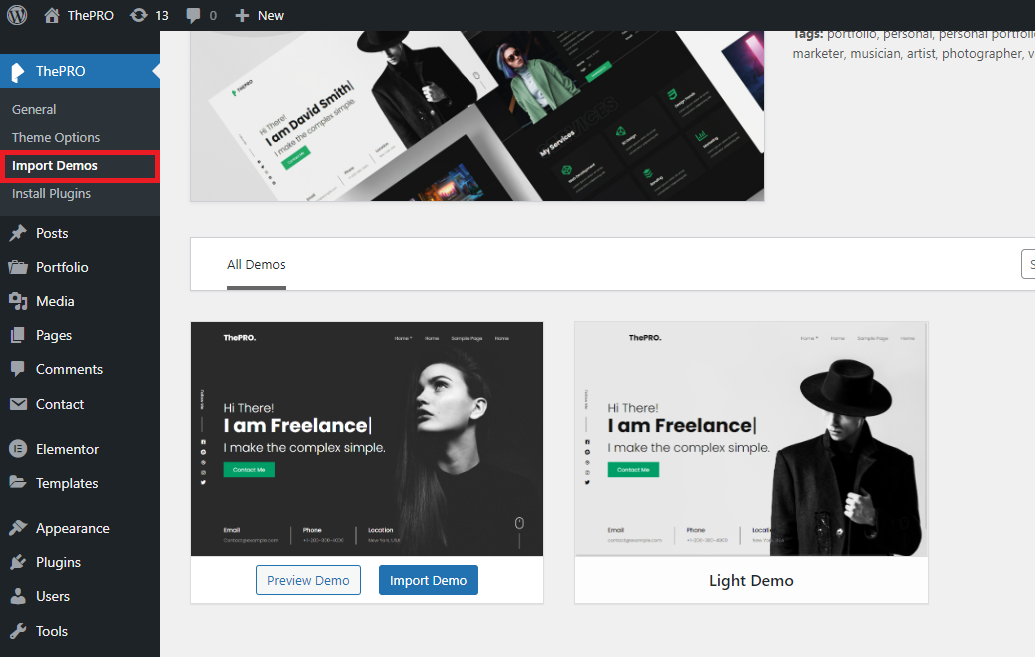
Once the importer has finished importing the demo content, a success message will appear, and the website will be ready for use.
Theme Update
To update our WordPress theme:
- Log in to your WordPress dashboard
- Go to Dashboard → Updates
- If a new version of ThePRO is available, it will be listed here
- In the Updates section, select ThePRO and click Update Themes
- Alternatively, go to Appearance → Themes, find ThePRO, and click Update Now if an update is available.
Optional: Manual Update
- Log in to your ThemeREC Account page.
- Go to the “Downloads” tab.
- Click “Download” button next to the ThePRO theme to download the thepro.zip file.
- Open your WordPress admin dashboard, navigate to Appearance → Themes, and click the “Add New” button at the top.
- Click the “Upload Theme” button.
- Click Choose File, then select the thepro.zip file you just downloaded, and click on Install Now.
- WordPress will automatically detect the existing theme and will give you the option to “Replace current with uploaded” version.
- After updating the theme, navigate to Plugins and verify if any plugins require an update. If so, make sure to update them as well.
Child Theme
A child theme is a theme that inherits the functionality, features, and design of a parent theme. It allows you to safely modify theme files, add custom code, or extend functionality without directly editing the parent theme. This ensures that your changes are not lost when the parent theme is updated.
For more information, please visit the official WordPress Child Theme Guide.
Child Theme Installation
To install ThePRO child theme:
- Download ThePRO Child Theme ↗
- Navigate to WordPress dashboard → Appearance → Themes, and click the “Add New” button at the top.
- Click the “Upload Theme” button and select the thepro-child.zip file you just downloaded.
- Once complete, click on the “Activate” link.
Using Child Theme
If you want to modify any specific template file from the parent theme, simply copy that file from the parent theme into the child theme folder while keeping the same folder structure.
For example: to modify the single.php file:
- Navigate to the parent theme directory
/wp-content/themes/thepro/ - Copy
single.phpfile - Paste the file into the child theme directory
/wp-content/themes/thepro-child/ - Edit the copied file in the child theme. WordPress will automatically use this version instead of the parent theme’s file.
Theme Options
The Theme Customizer allows you to visually manage and personalize your website in real time. You can access it by navigating to the WordPress dashboard → ThePRO → Theme Options.
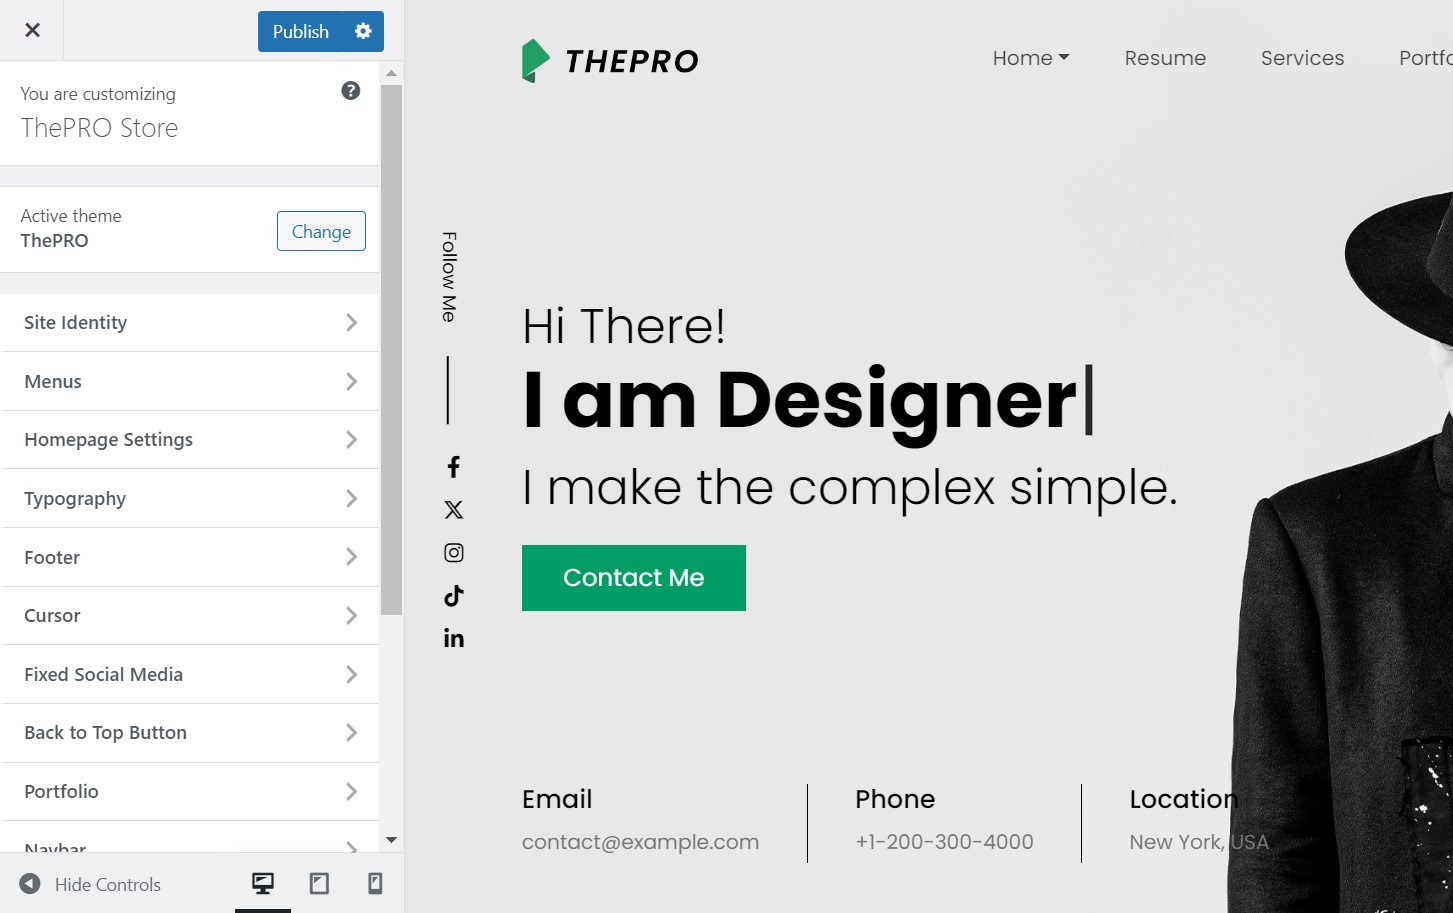
Cursor
The Cursor allows you to enable/disable and select the style and the color of your cursor with the option to remove the default cursor
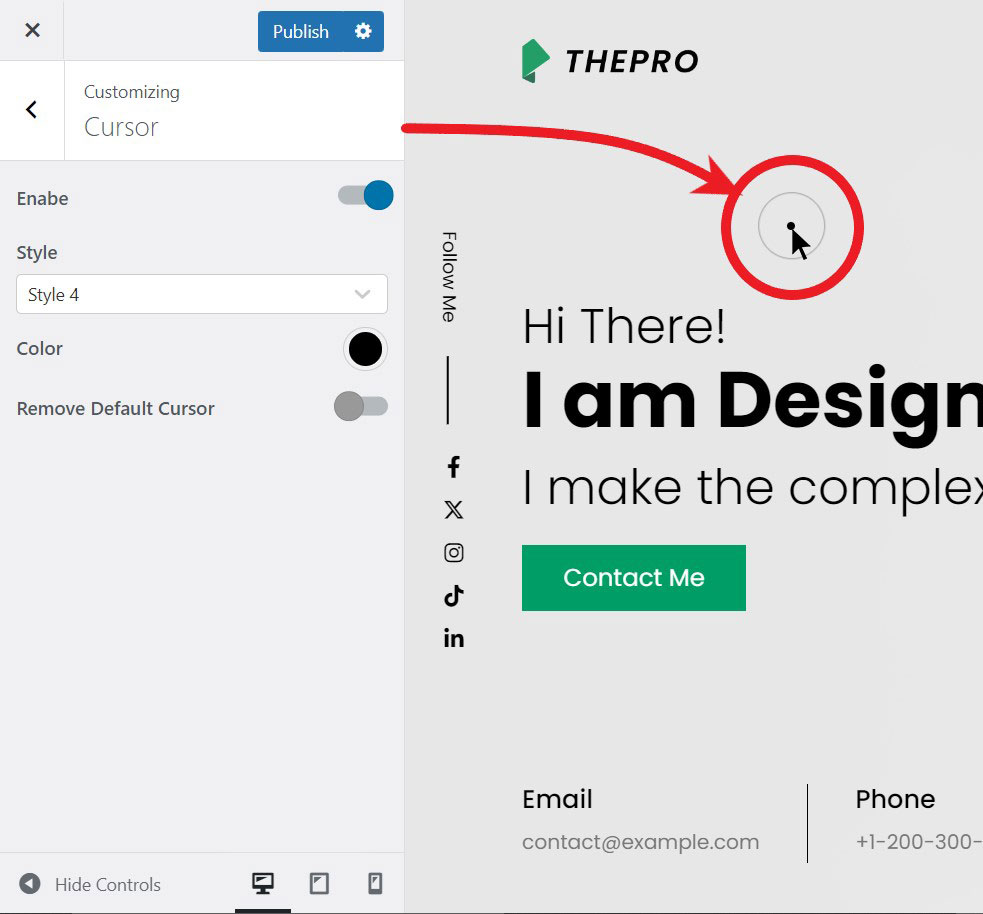
Fixed Social Media
The Fixed Social Media allows you to enable/disable, and add social media icons by clicking on “Add new” selecting the social media, and setting the URL.
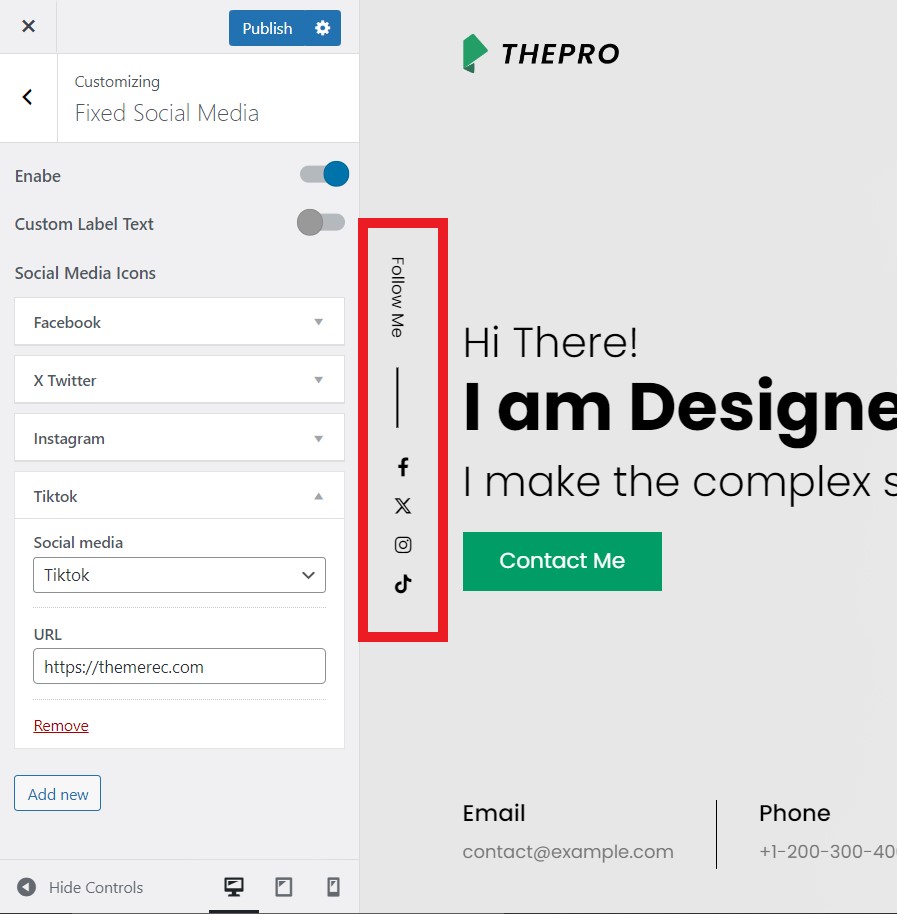
Back to Top
The Back to Top allows you to enable/disable the button.
Styling
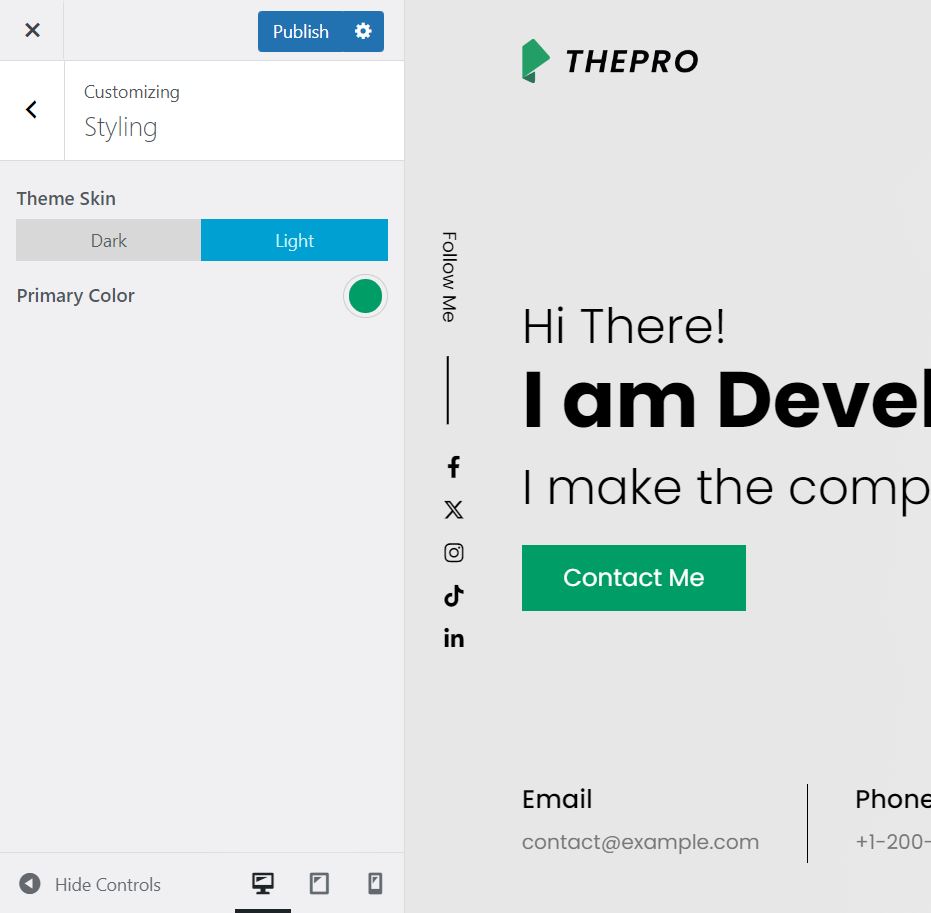
The Styling allows you to choose between dark and light Theme Skin, and set your Primary Color (which is used in links, icons, buttons …).
Preloader
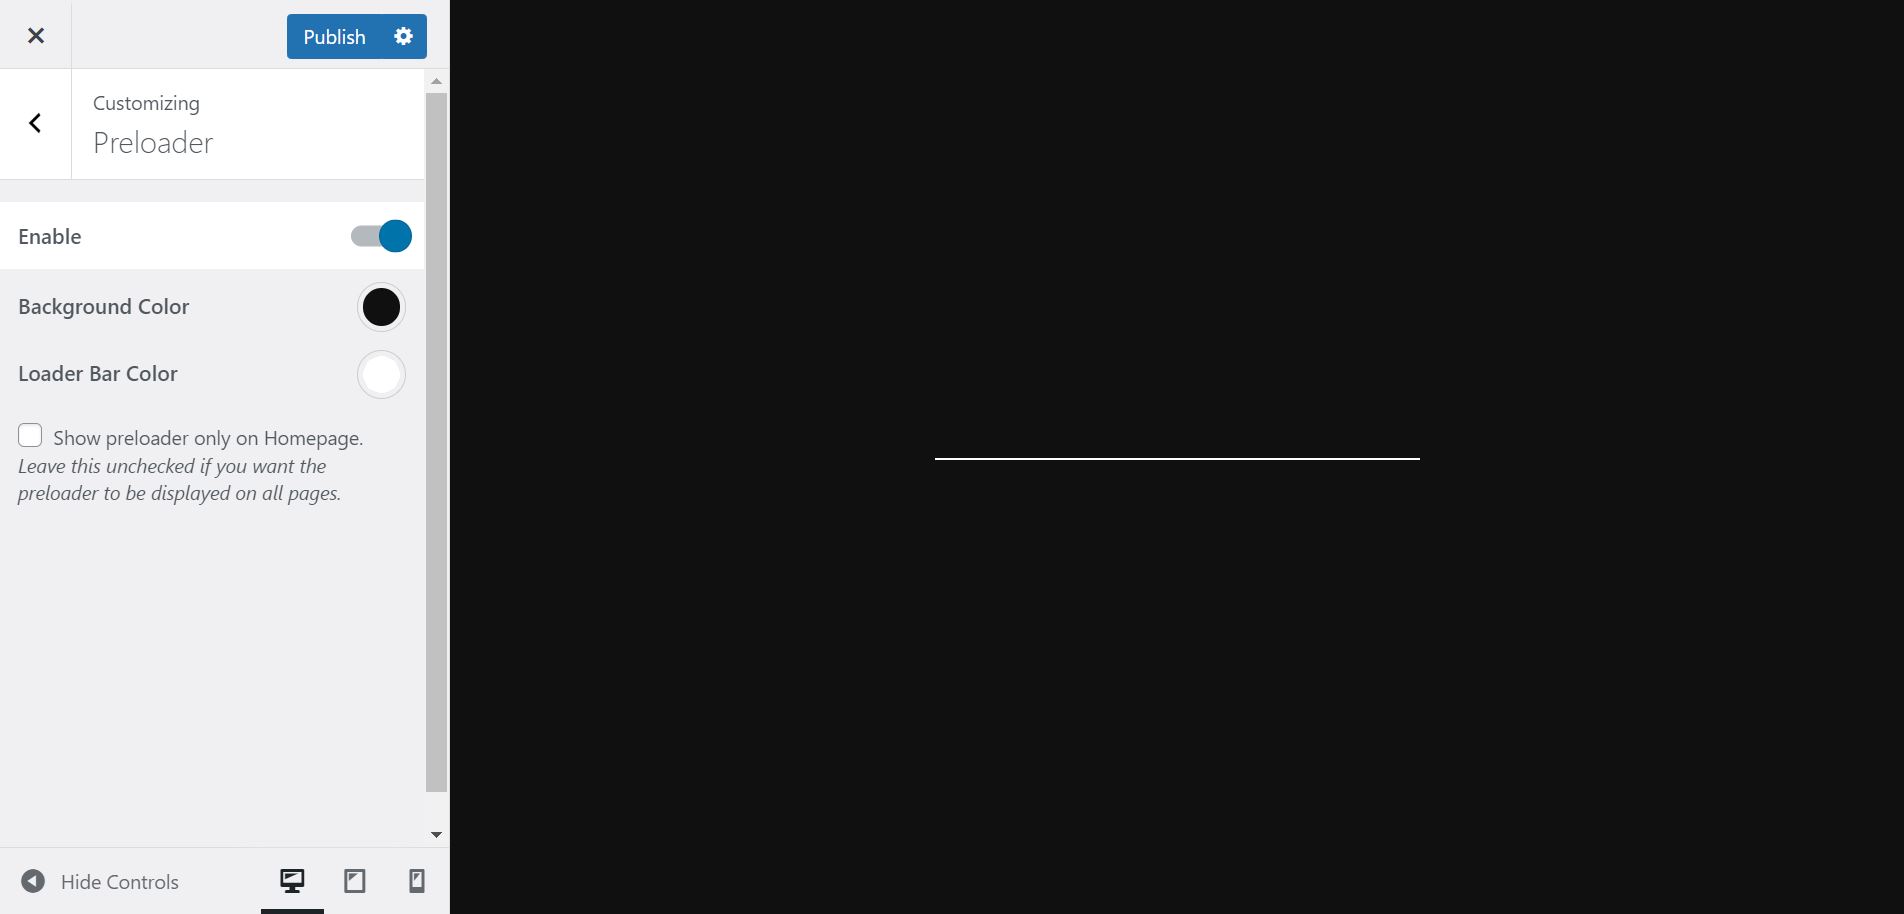
The Preloader allows you to enable/disable and set the style of your preloader (by adding the background and the loader bar colors).
Portfolio
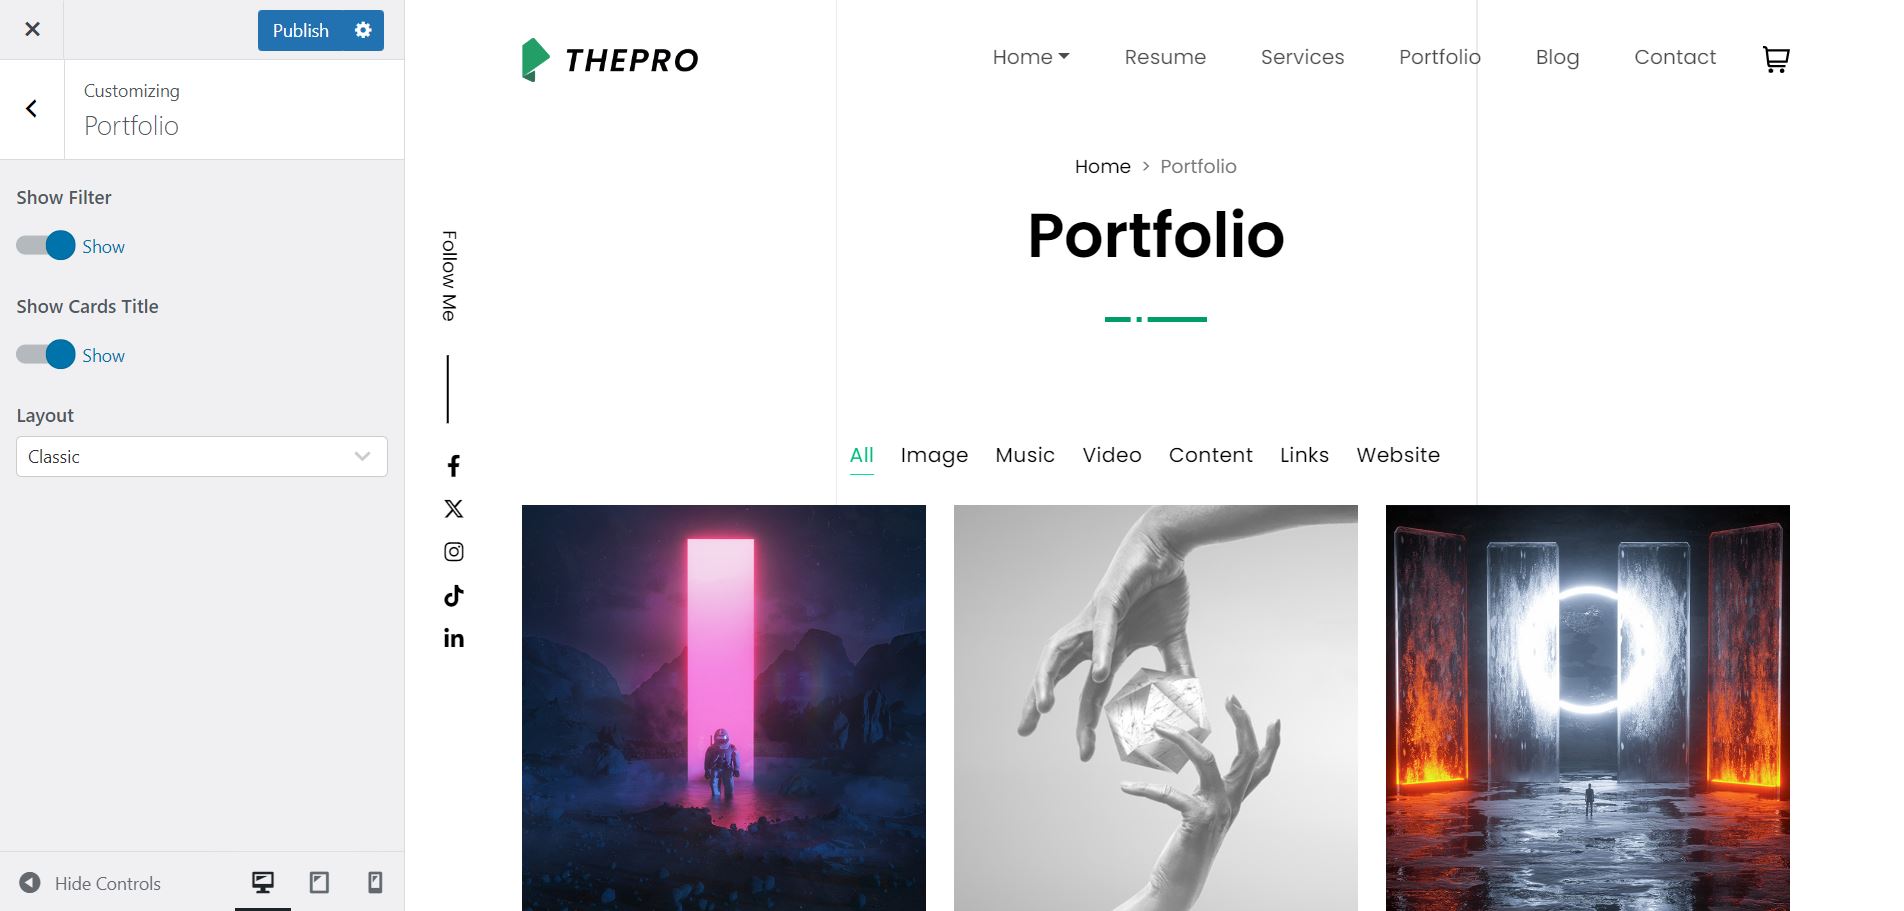
The Portfolio allows you to enable/disable the filter and Cards title, and select the layout.
Navbar
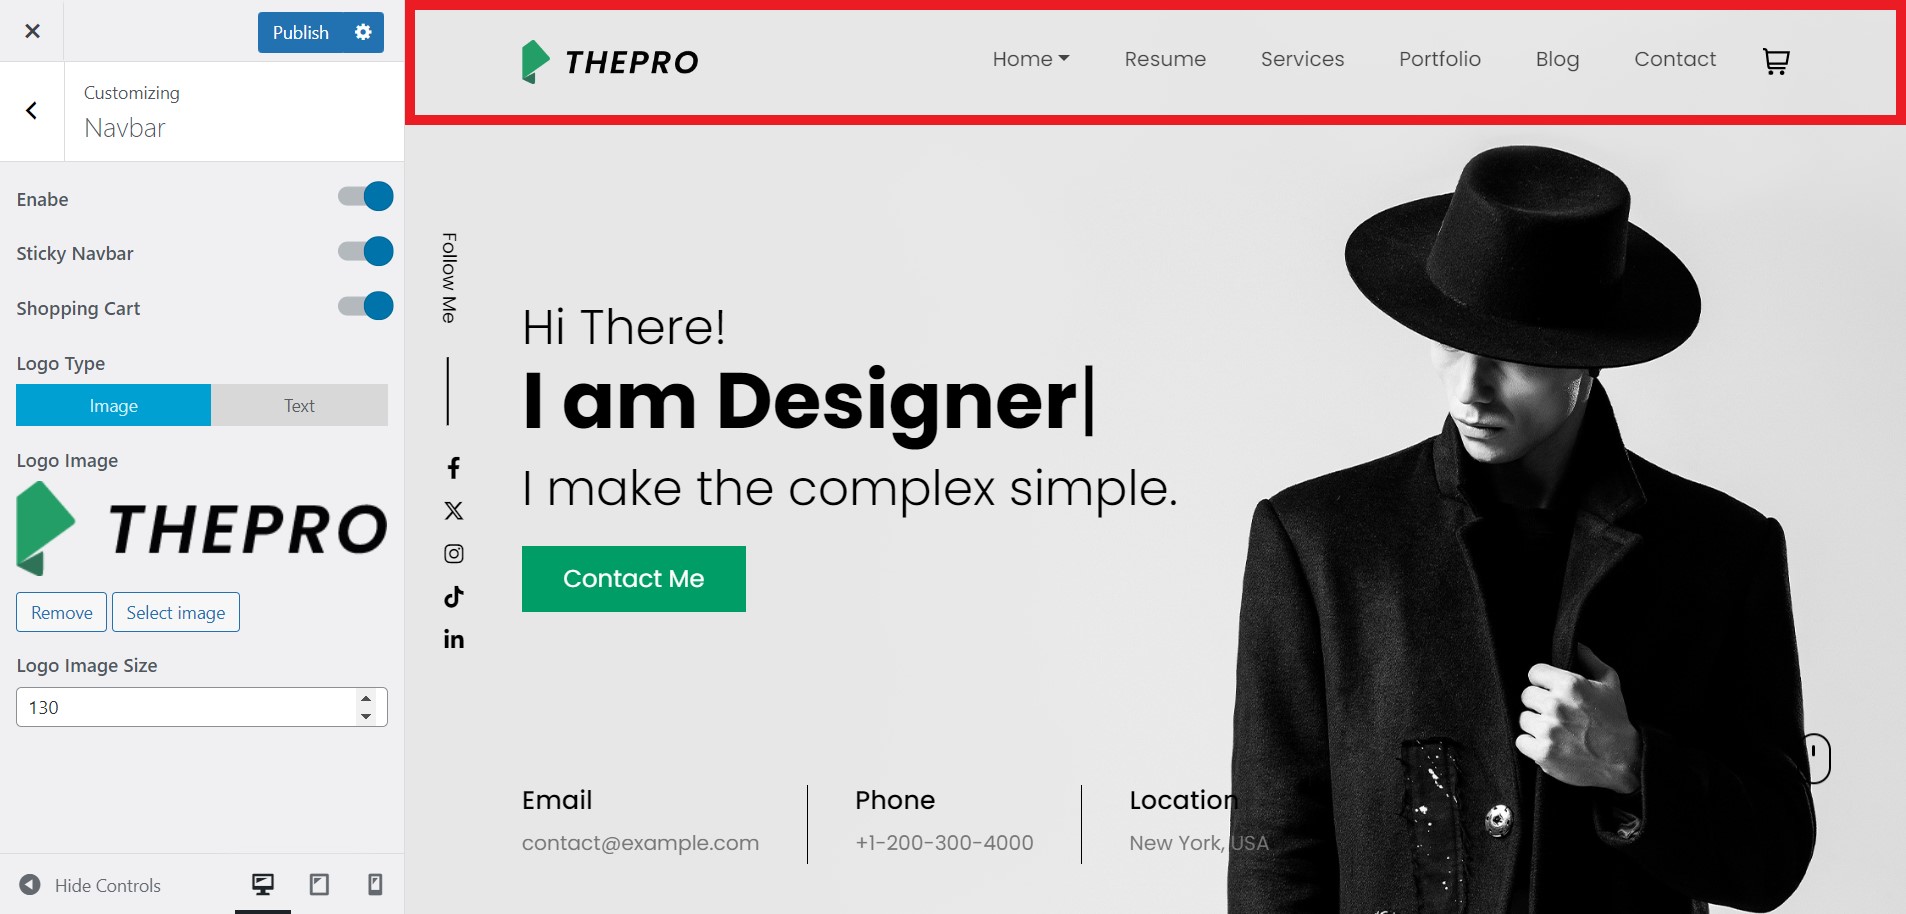
The Navbar allows you to enable/disable the navbar part and the sticky navbar option (the sticky navbar ‘sticks’ the navbar part of your website even when the page is scrolled down) and the shopping cart icon. Also, it allows you to set the logo of your navbar.
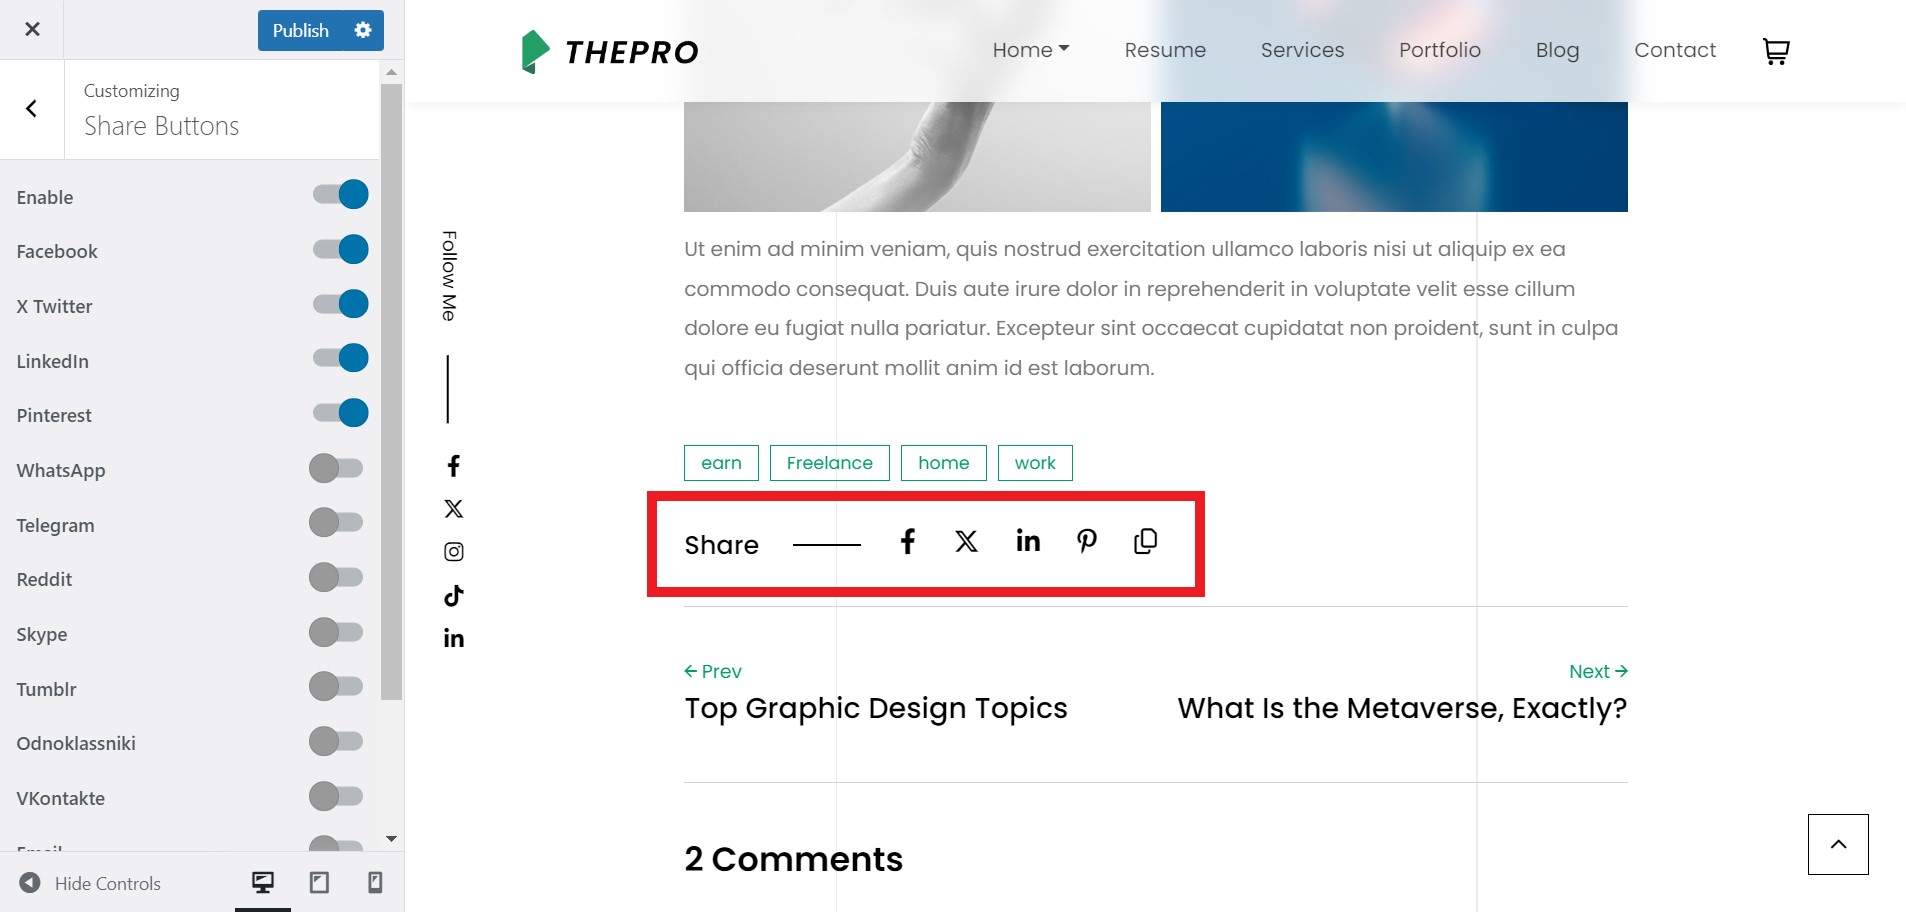
Share Buttons
The Share Buttons allow you to enable/disable and set which social networks you want to use for the share section including the share by email, print option, and copy the URL.
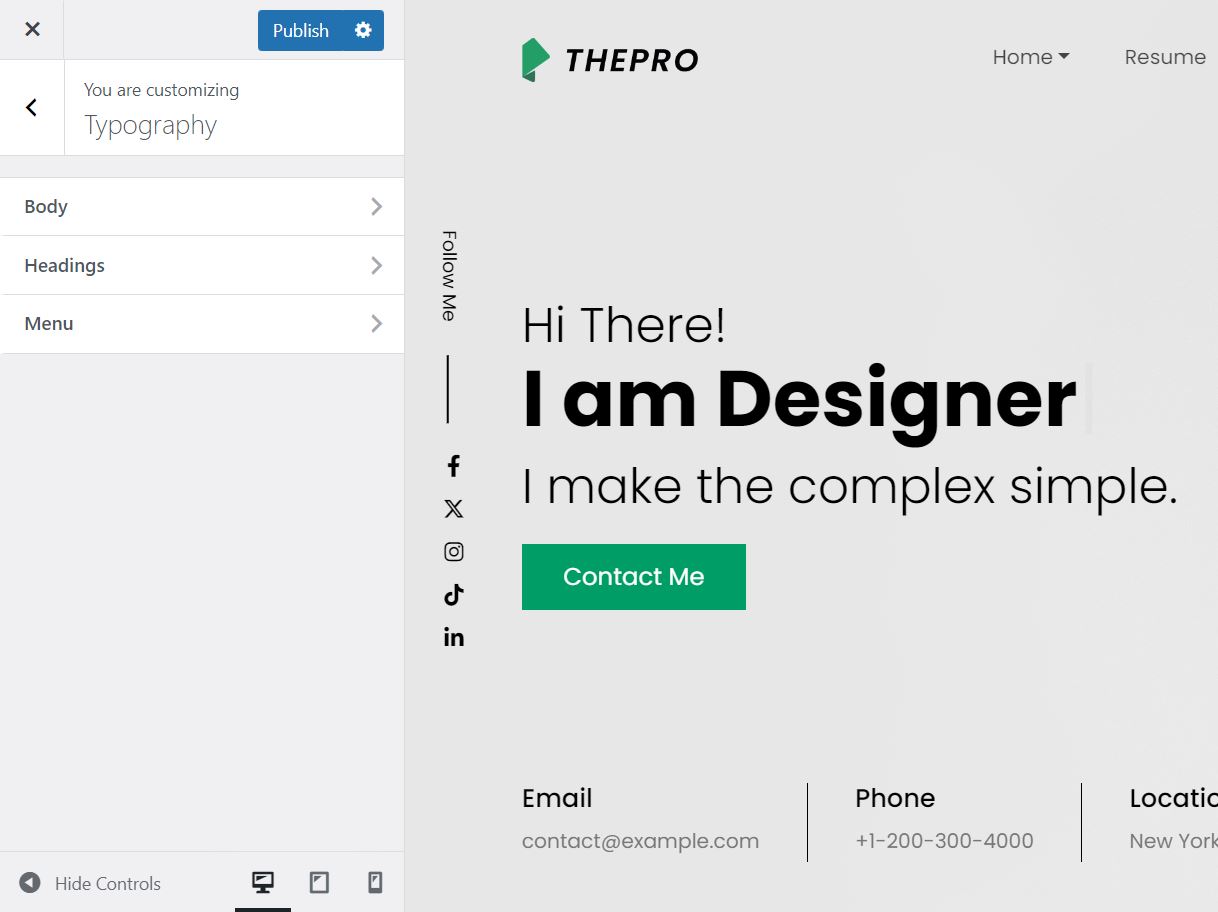
Typography
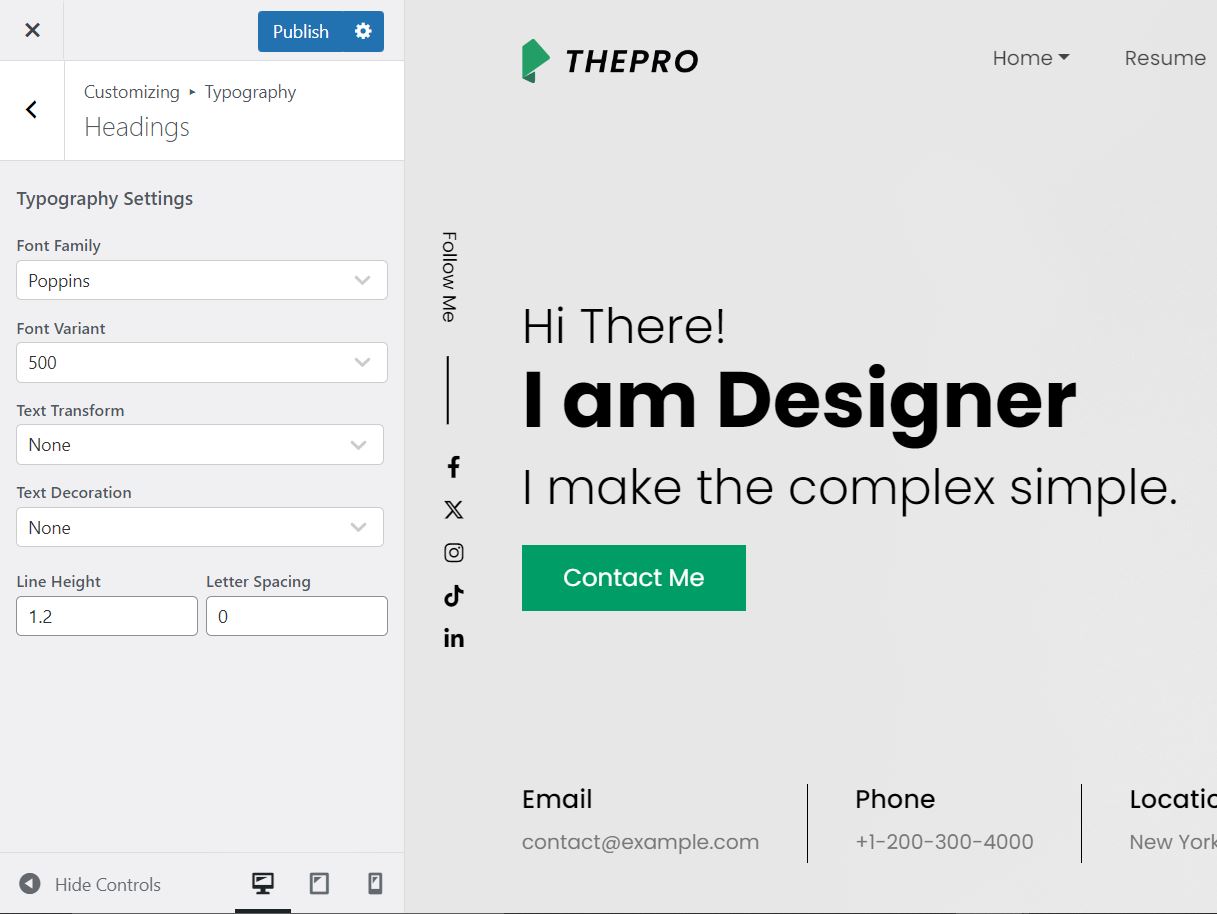
The Typography setting is divided into 3 sections (Body, Headings, Menu), you can access each section and adjust their font typography settings such as font family, font variant, line height, and others.
Footer
The Footer section allows you to control how the footer area of your website is displayed. You can either use the default theme footer or create a fully custom footer using Elementor.
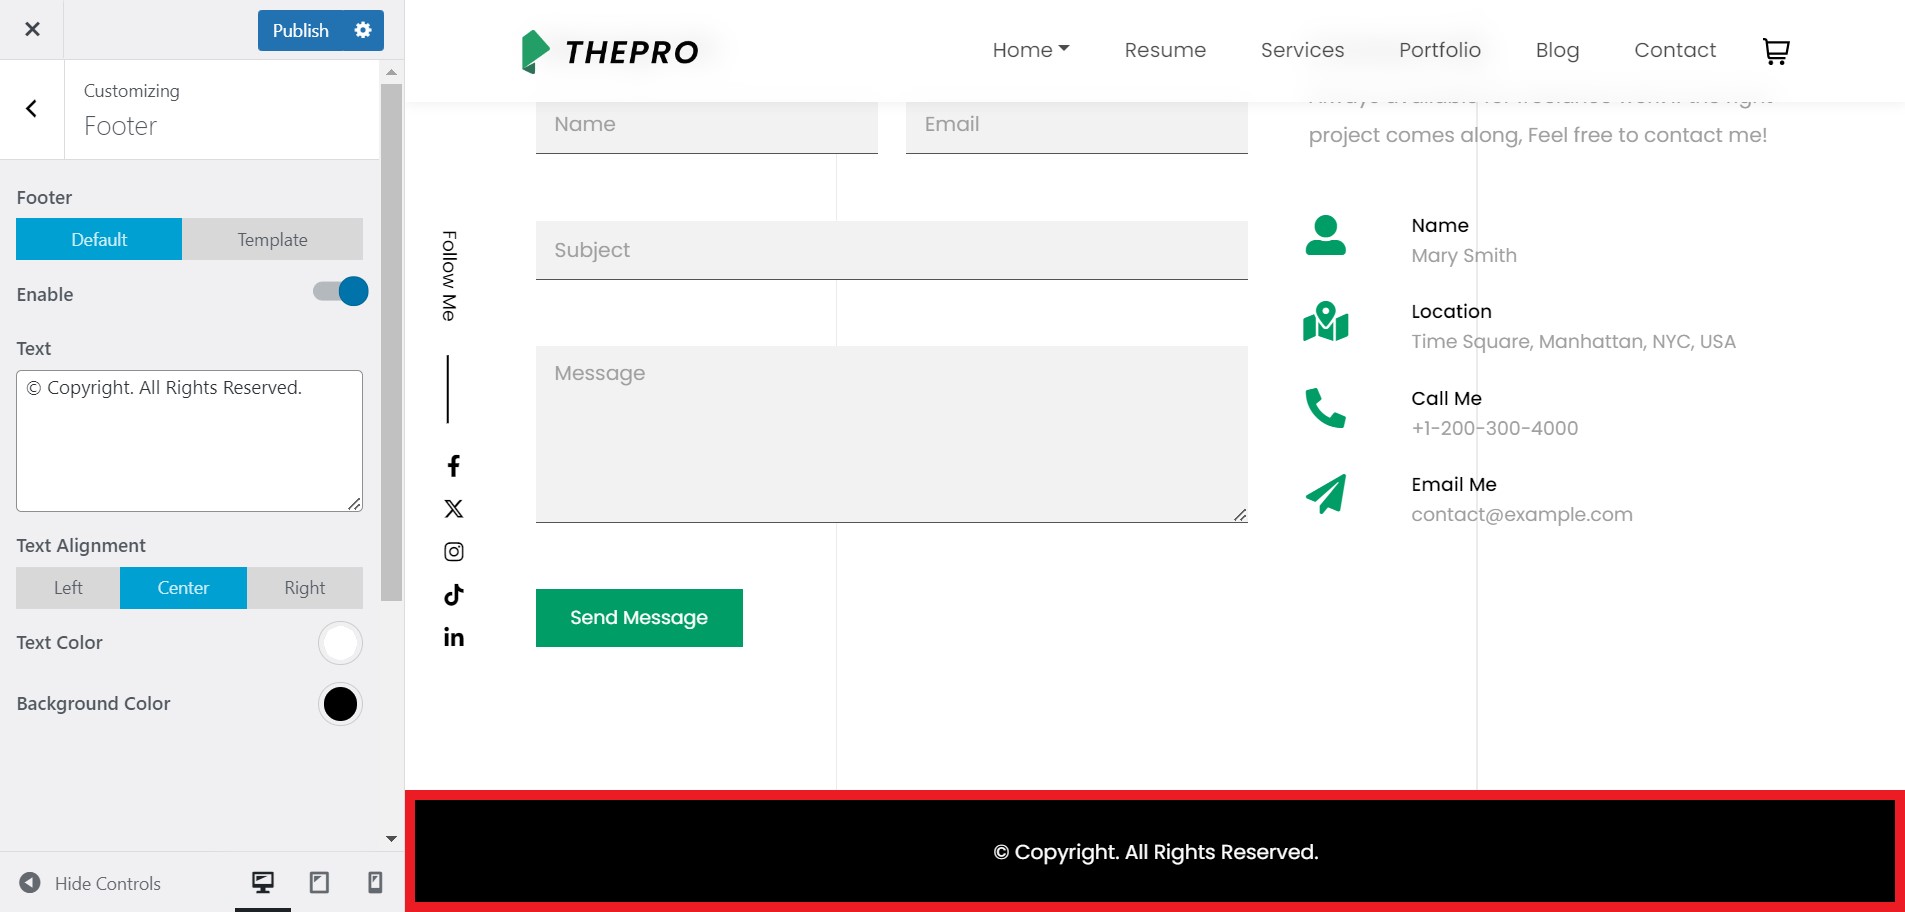
Default Footer
If you select Default as the Footer Type, you’ll be able to manage the default theme footer settings.
Custom Footer
If you select Template as the Footer Type, the theme allows you to build a completely custom footer layout using Elementor.
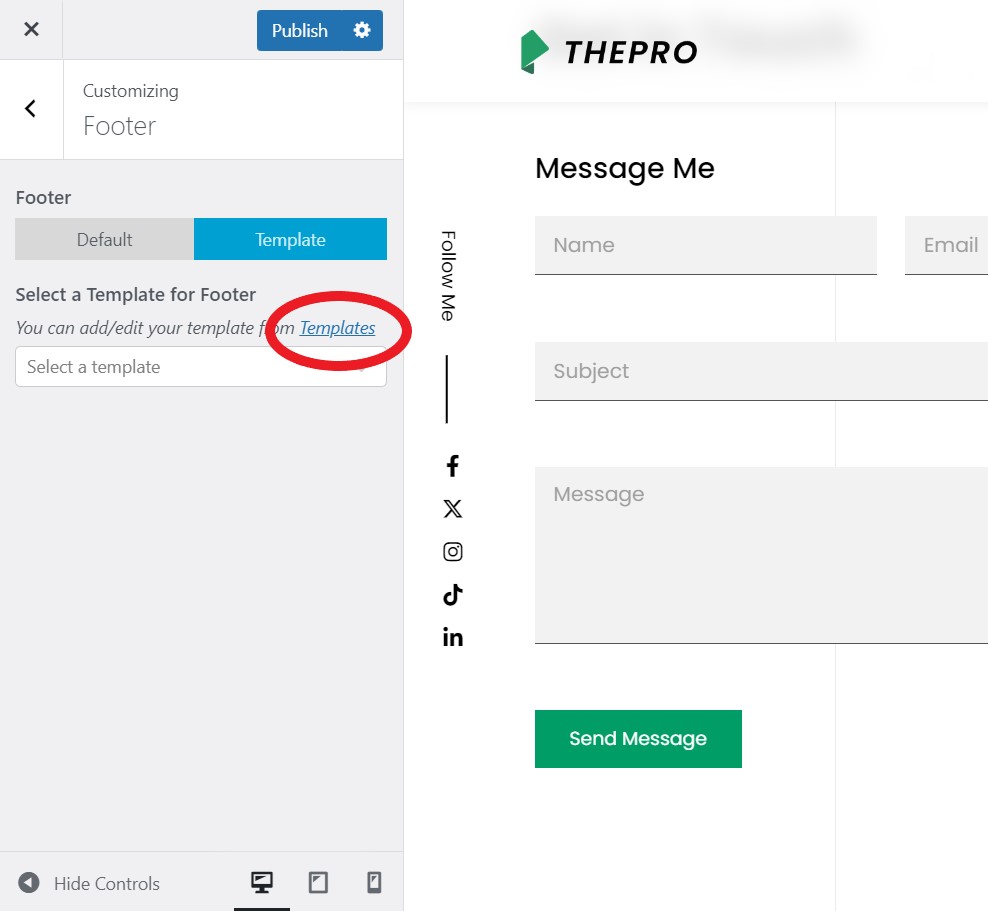
Follow these steps to create your custom footer template with Elementor:
- Go to Dashboard → Elementor → Editor → Templates → Add New Template.
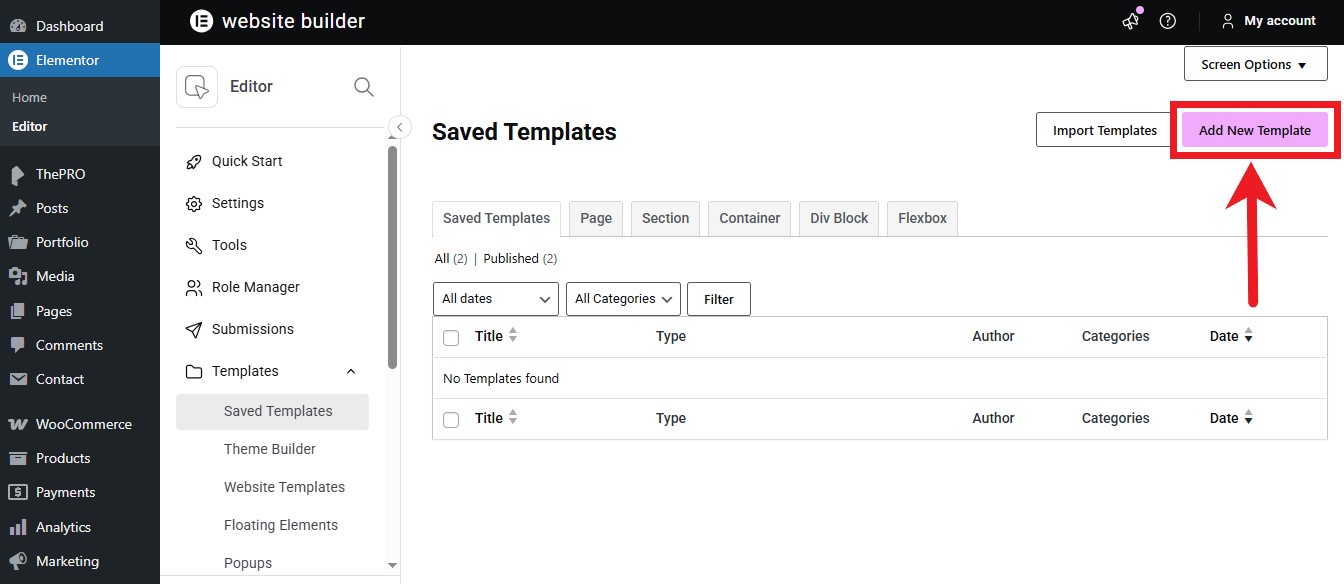
- Select Section as the template type.
- Give your template a name (for example: My Site Footer).
- Click Create Template.
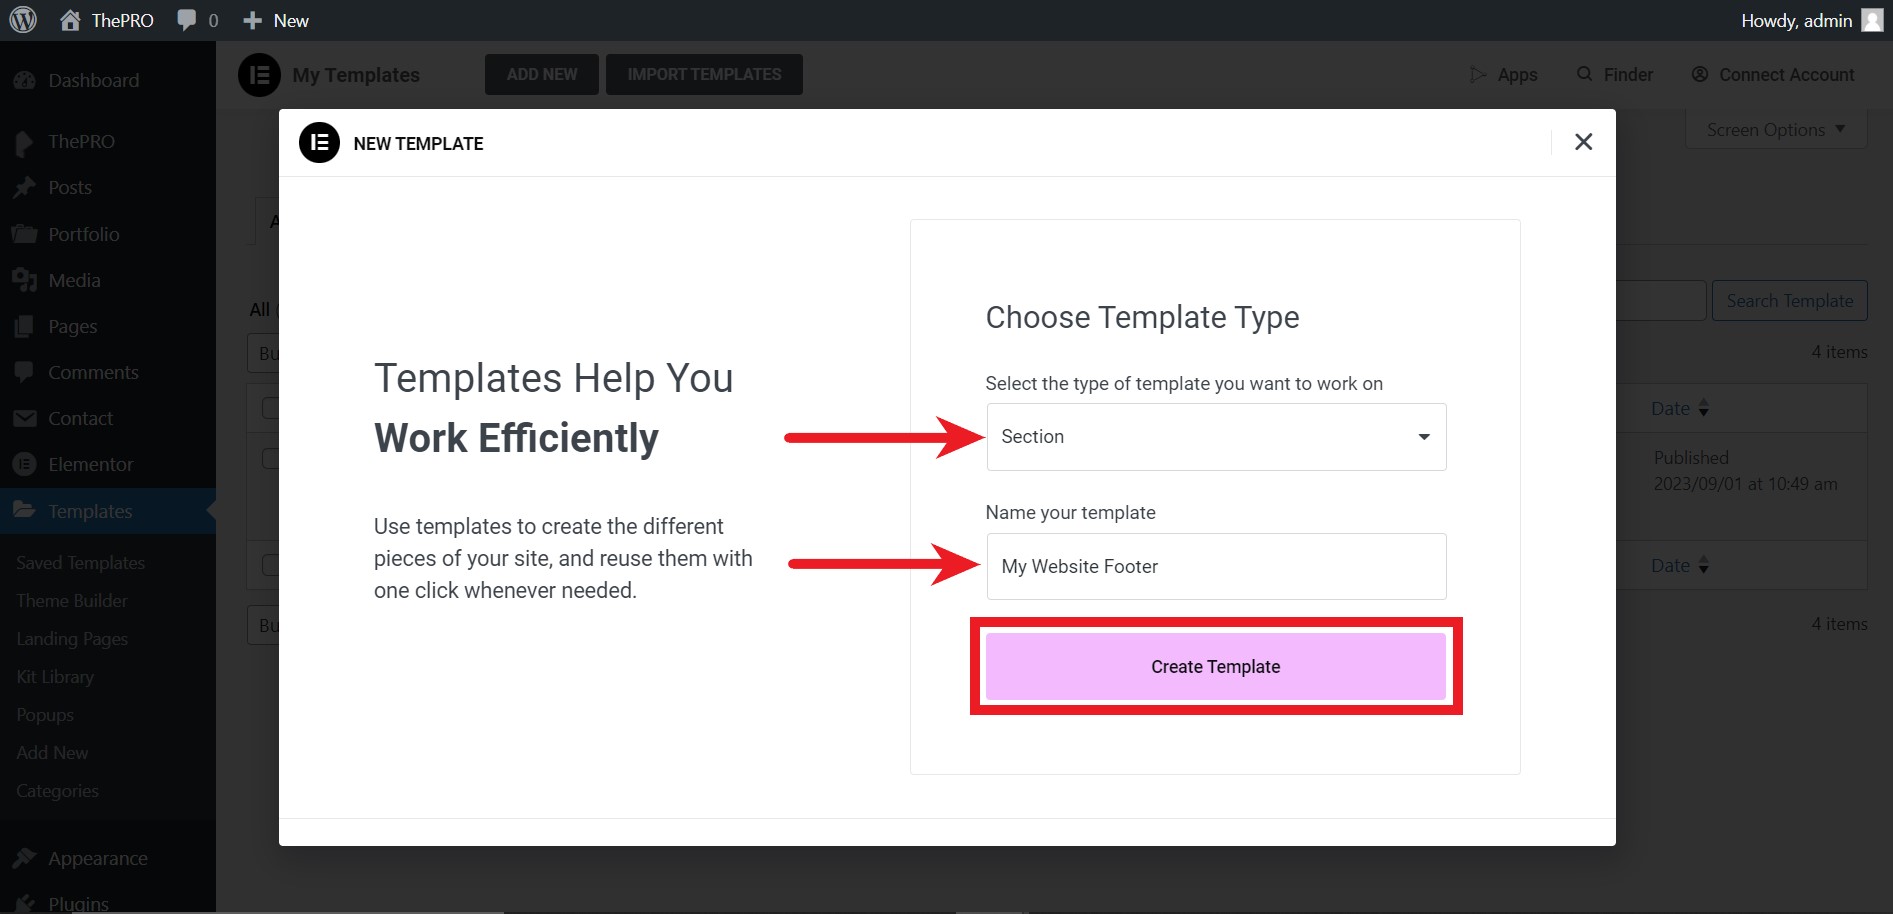
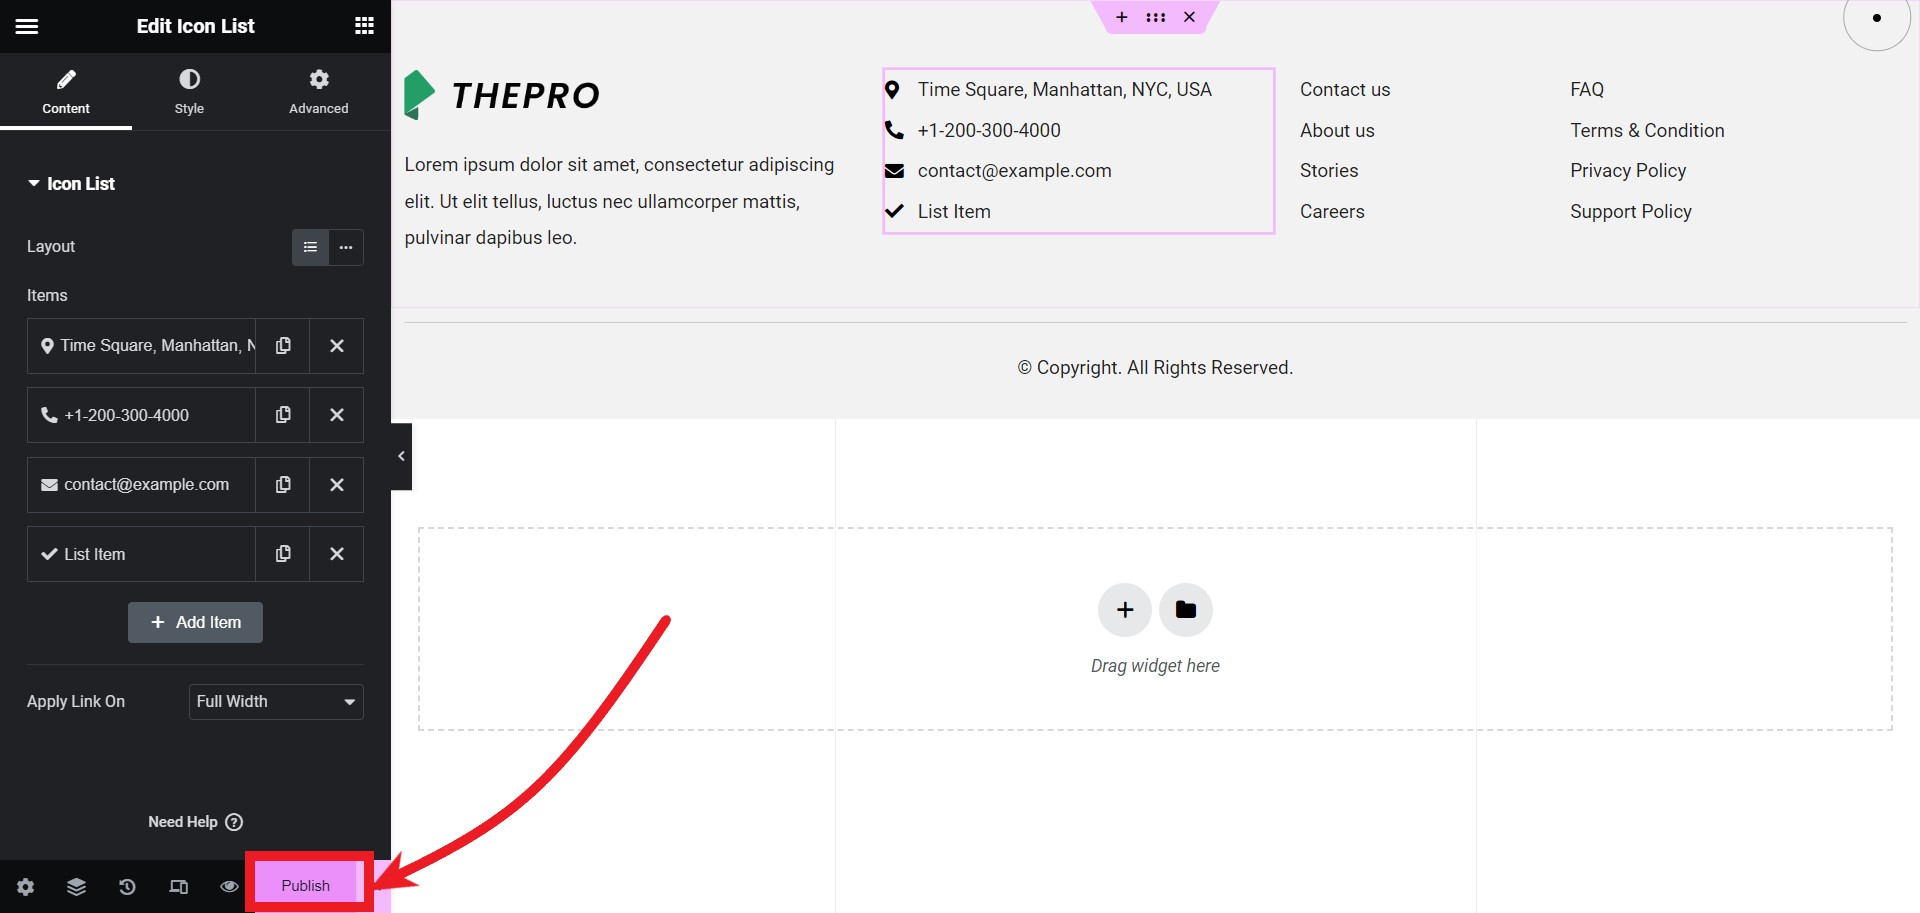
- The Elementor editor will open.
- Use Elementor editor to design your footer layout.
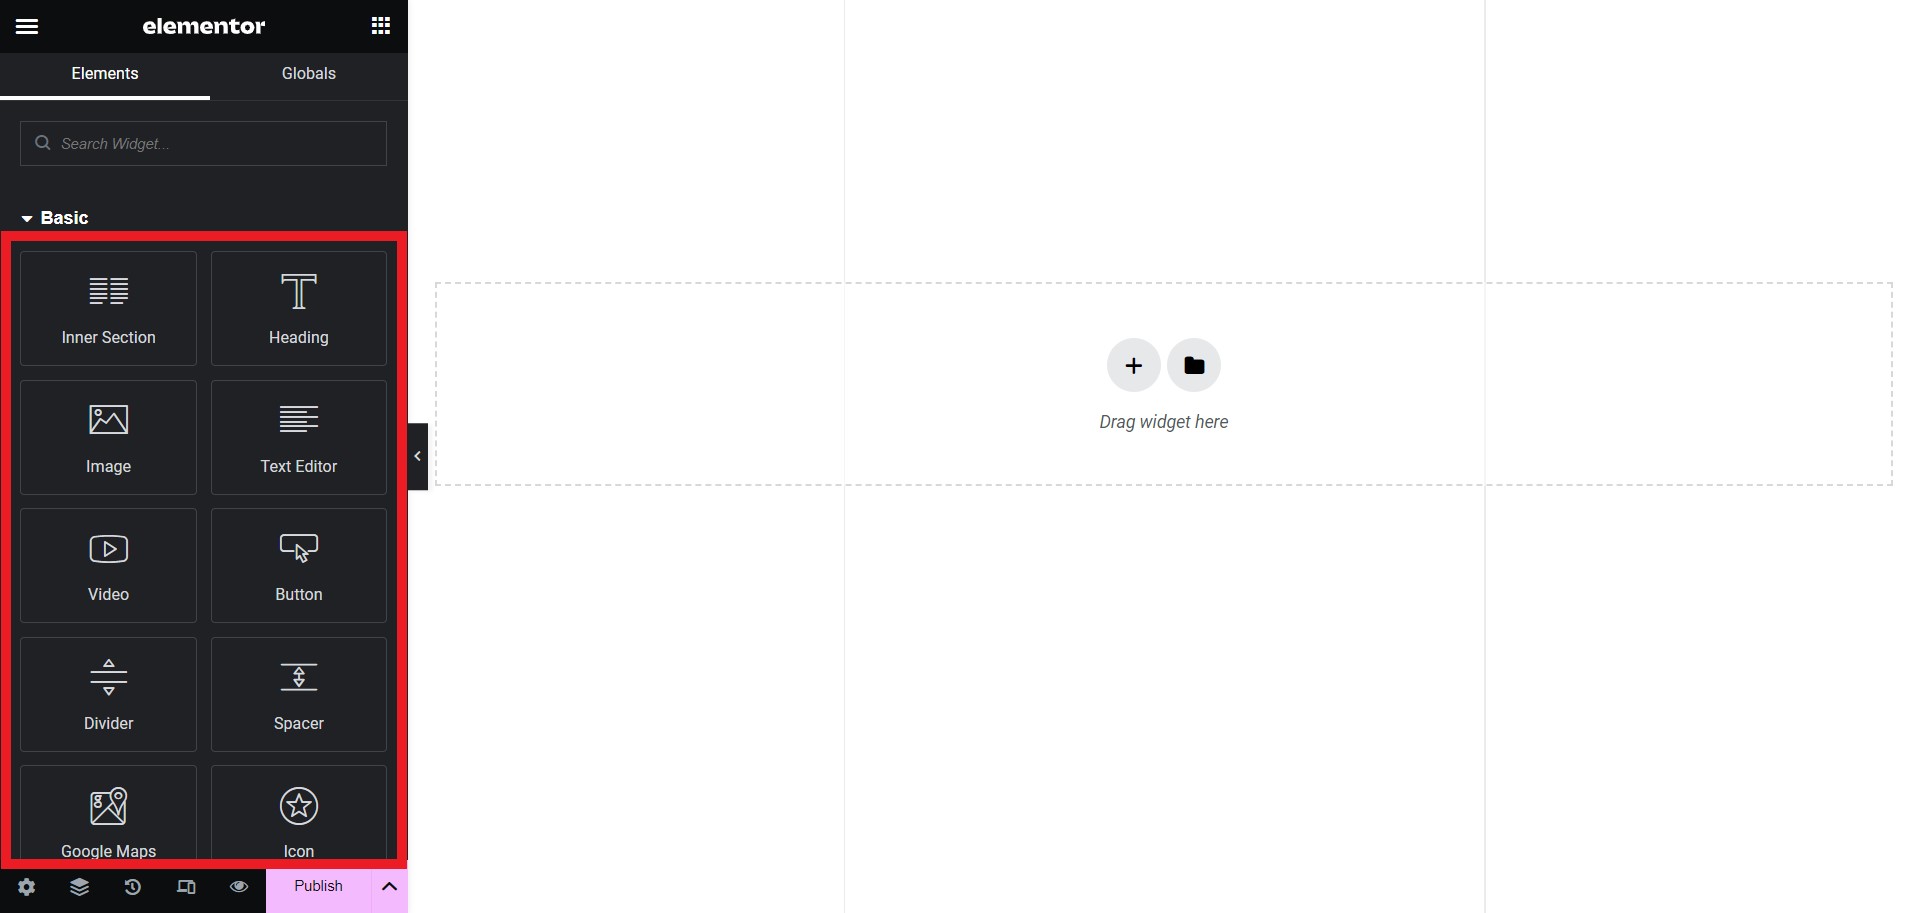
- Once you finish designing the footer, click Publish.
- Go to Dashboard → ThePRO → Theme Options → Footer.
- Select Template as the Footer Type.
- In the Select Custom Template field, choose the template you created by its name (for example: My Site Footer).
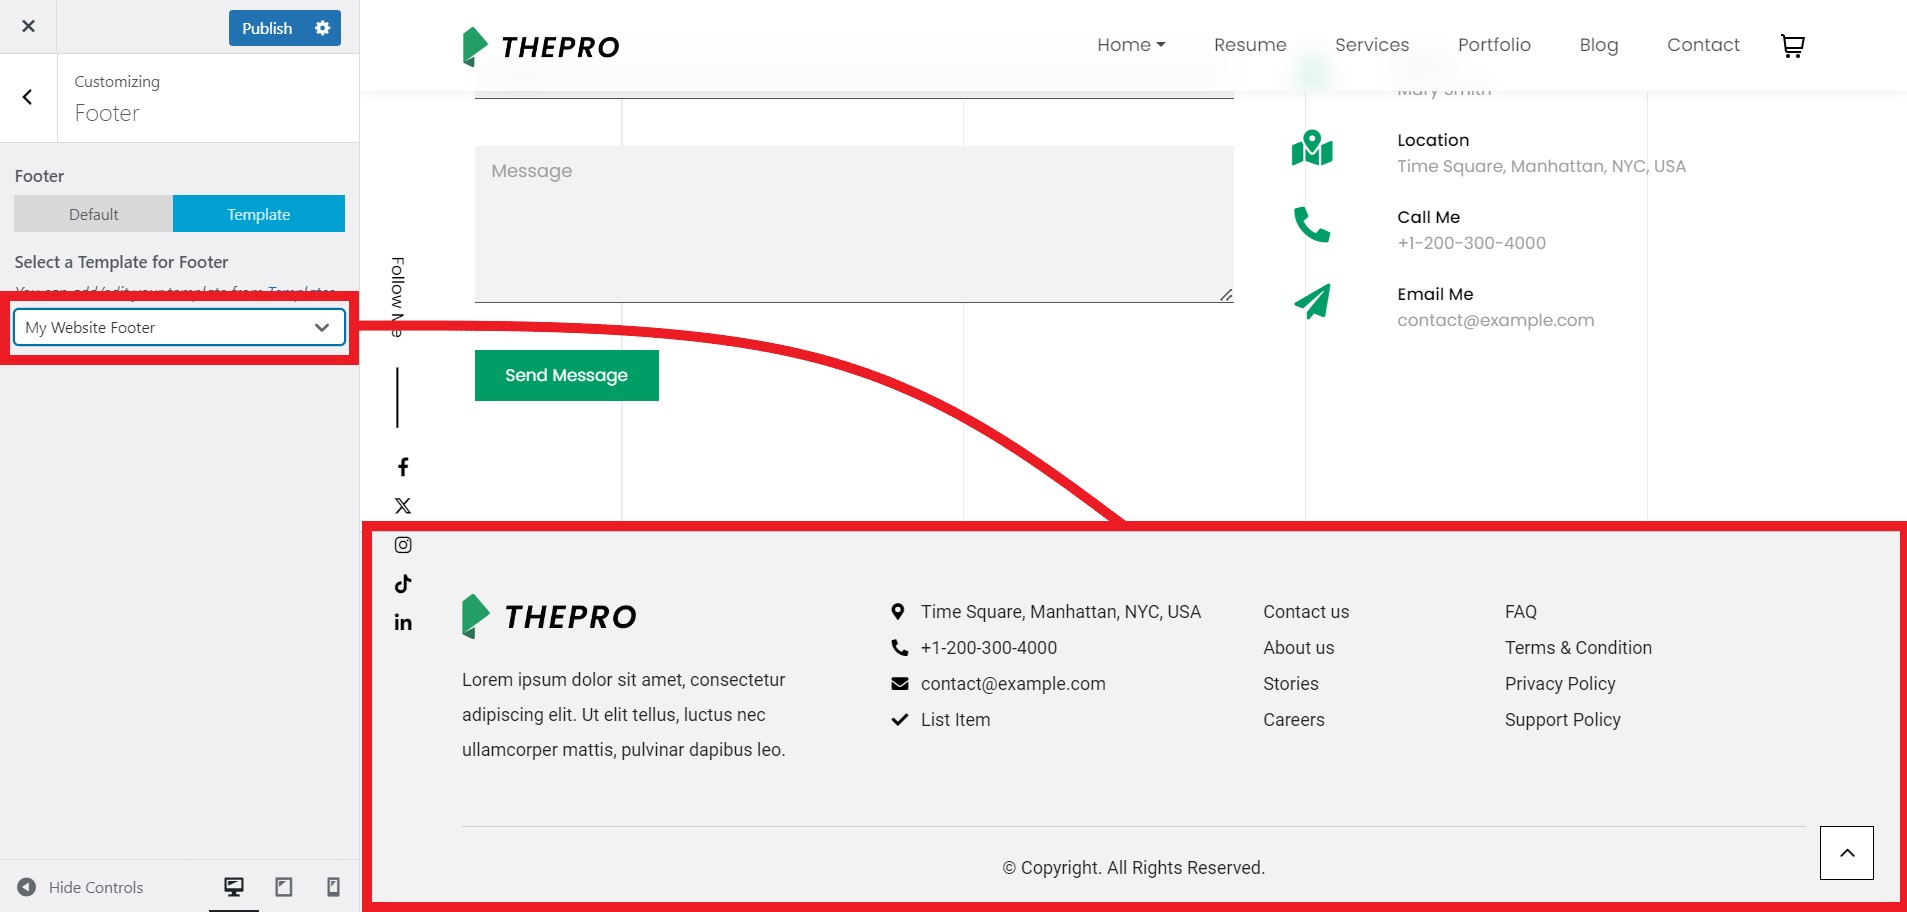
- Click Publish to save your changes.
Pages
This theme is fully compatible with Elementor, allowing you to build and customize pages visually using drag-and-drop tools without writing any code. In addition to Elementor’s default widgets, ThePRO includes a set of custom Elementor widgets designed specifically for the theme.
Create Page
To create and configure a page:
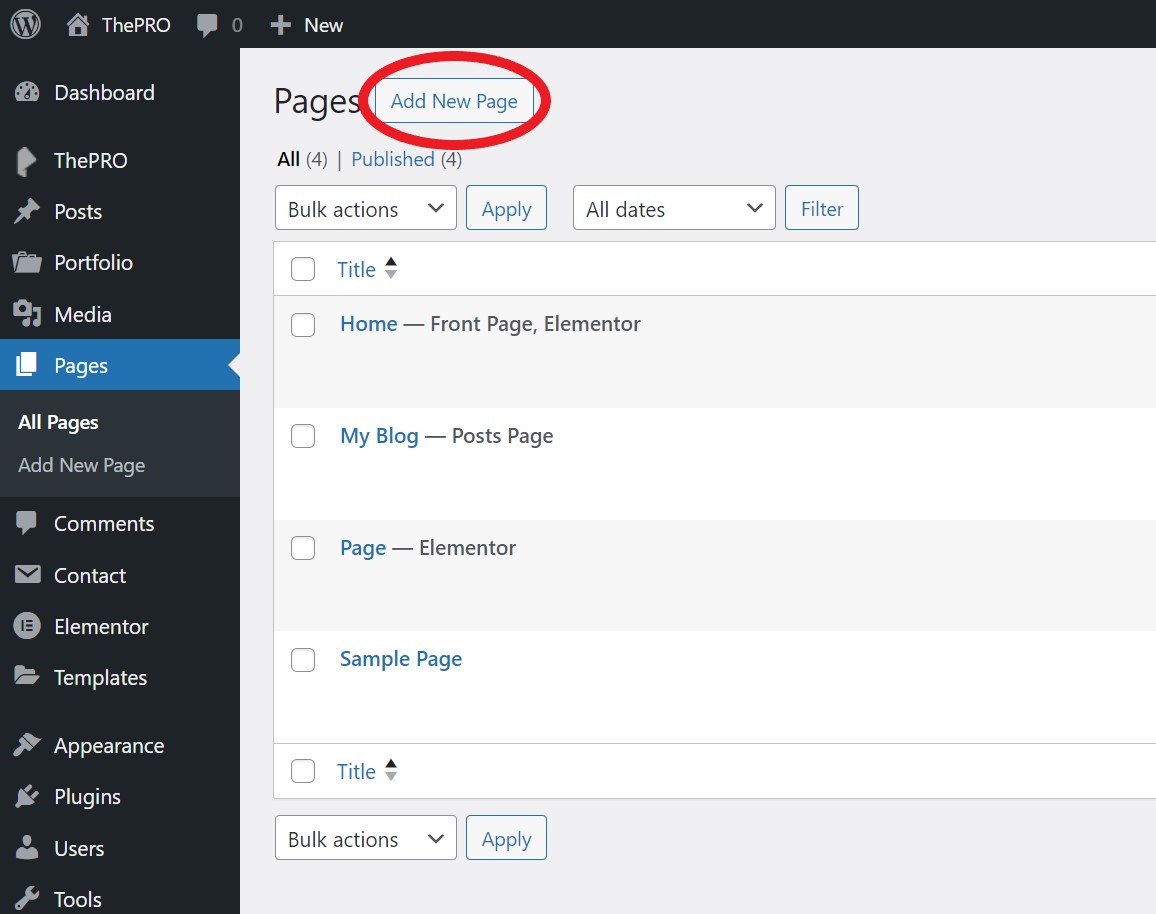
- Navigate to WordPress dashboard → Pages → Add New Page
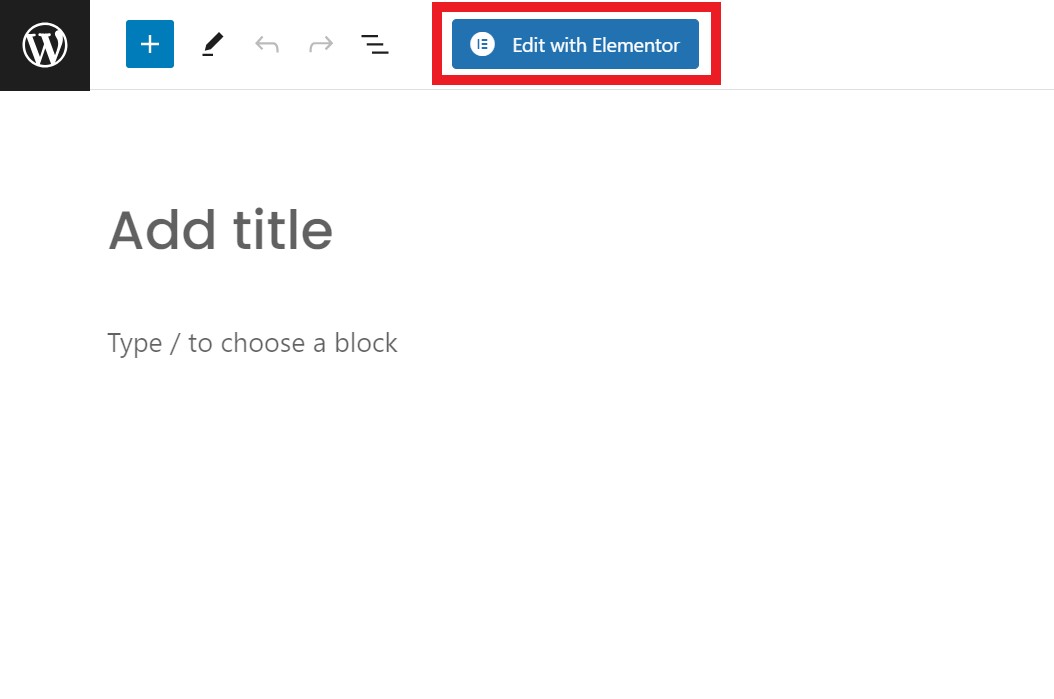
- Add your page title at the top.
- Click the Edit with Elementor button.
- Elementor’s visual editor will open, displaying the live preview of your page on the right and the Elementor panel on the left.
- Inside the Elementor editor, you can:
- Add new sections by clicking the “+” button.
- Choose the column structure for each section.
- Drag and drop widgets from the left sidebar panel into your page.
- Edit content, layout, and styling in real time.
- Click Publish to make a new page live.
Custom Elementor Widget
This theme provides a collection of custom Elementor widgets that are grouped inside the Elementor editor sidebar under the “ThePRO” section. These widgets are tailored to work seamlessly with the theme’s design and post layouts.
Available ThePRO widgets include:
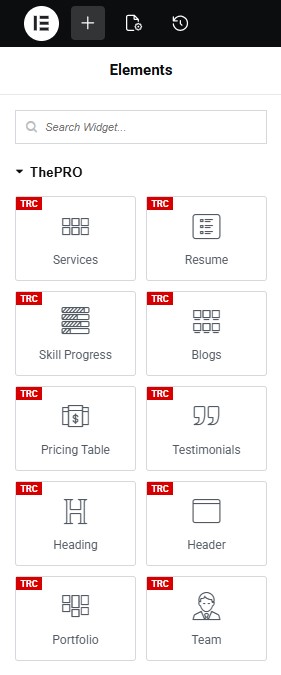
To use any of these widgets, simply drag it from the ThePRO group into your page and adjust its settings from the widget options panel.
Edit Page
To edit an existing page:
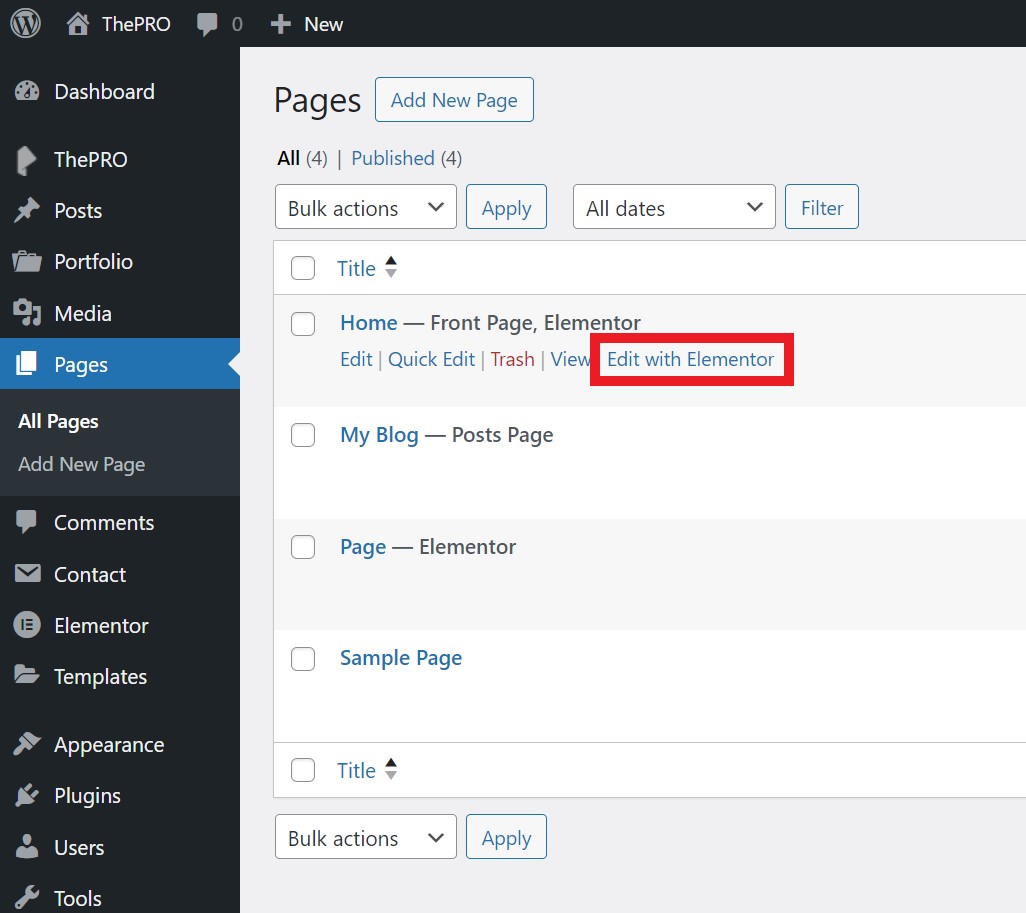
- Navigate to WordPress dashboard → Pages → All Pages
- Hover over the page you want to edit and click Edit with Elementor.
- Make your changes to the content, widgets, or layouts as needed.
- Click Update to save the changes.
Please visit the official Elementor plugin documentation for detailed guidance.
Portfolio
The theme includes a built-in Portfolio custom post type that allows you to create projects.
Create and Edit Project
To create and configure a project:
- Navigate to WordPress dashboard → Portfolio→ Add New
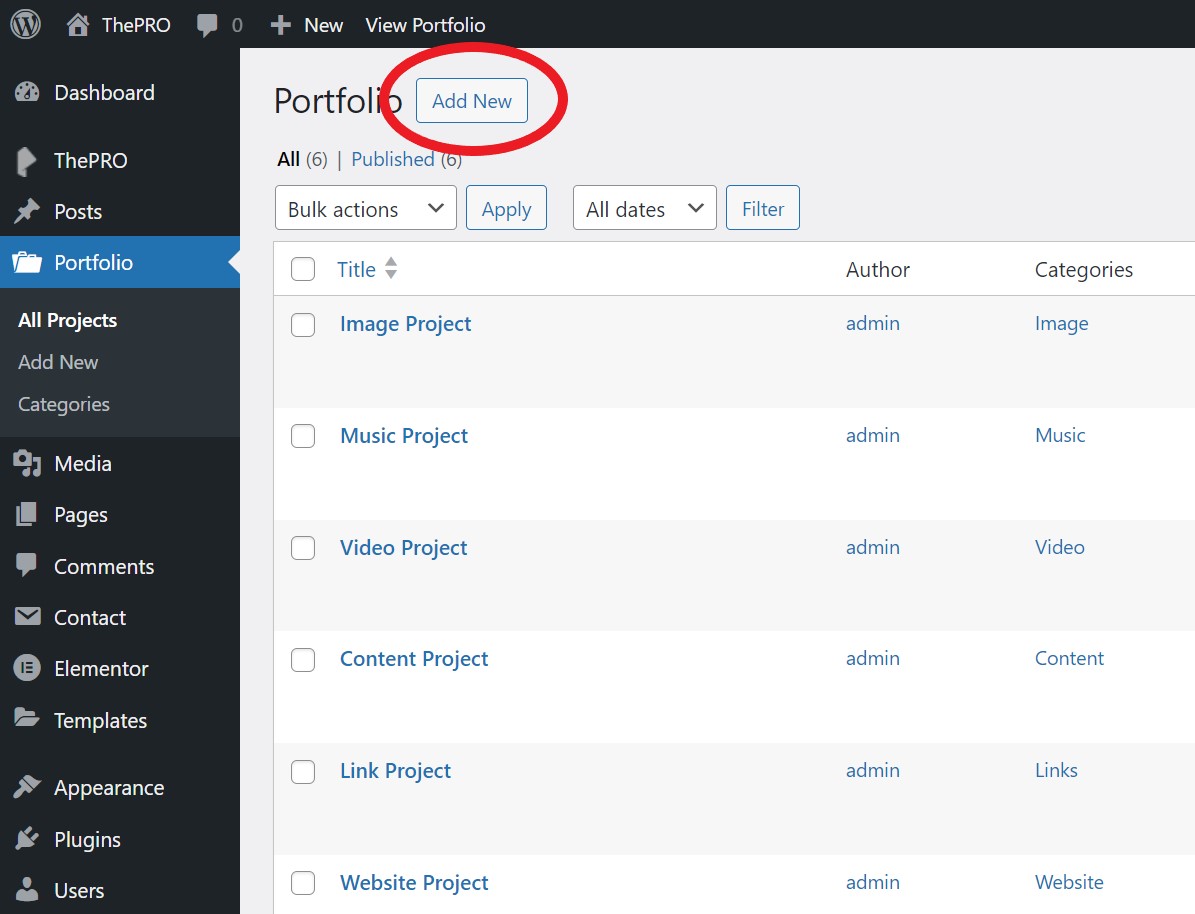
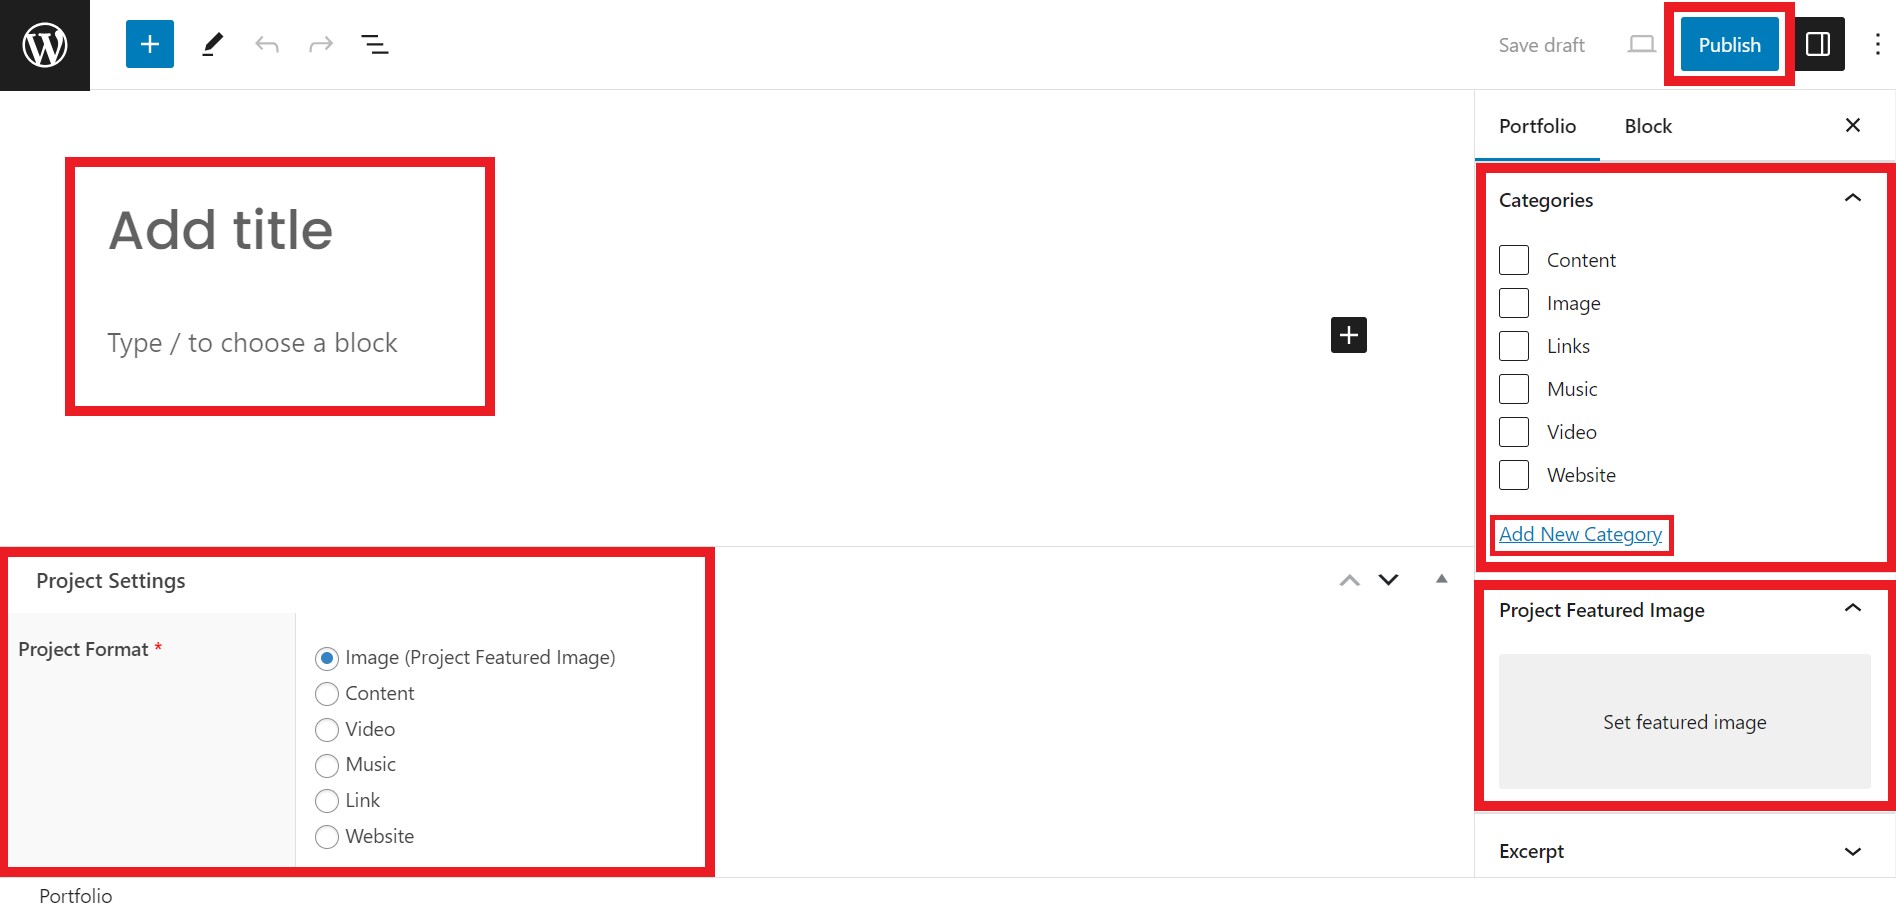
- Add your project title at the top.
- Enter your project content using the block editor (Gutenberg): click “+” to add blocks (paragraphs, headings, images, videos, etc.).
- In the settings panel, configure project settings:
- Categories – choose or create a category.
- Project Featured Image – set the main image for the project.
- Project Format – choose the project format. The theme includes conditional settings based on the chosen format. When you choose Image, Content, Video, Audio, Link, or Website, an additional options panel will automatically appear in the project editor, allowing you to enter the required information for that format.
- Click Publish to save changes.
Contact Form 7
Contact Form 7 is one of the most popular form builders for wordpress.
We have created style ready for you to use (Before, you should to import an demo from Demo Import for use ThePRO Contact Form)
To Setting up contact form:
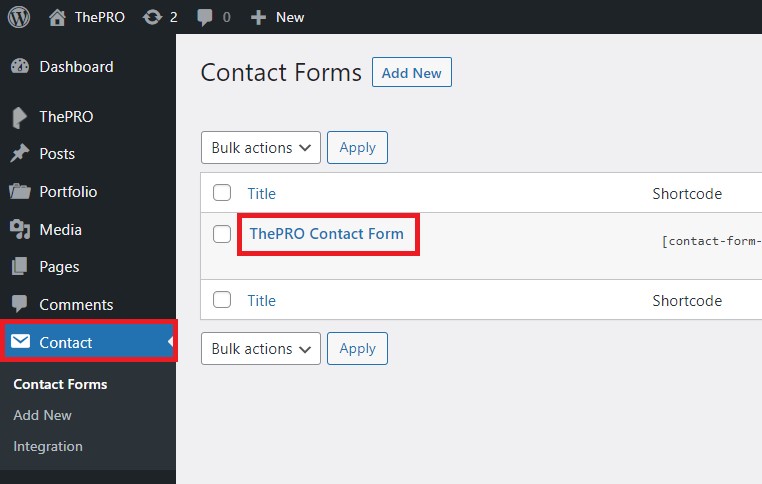
- From WordPress Dashboard go to Contact
- If want to create you own form style click Add New, Or if you want to use ThePRO Contact Form, click ThePRO Contact Form as below:
- Click on Mail
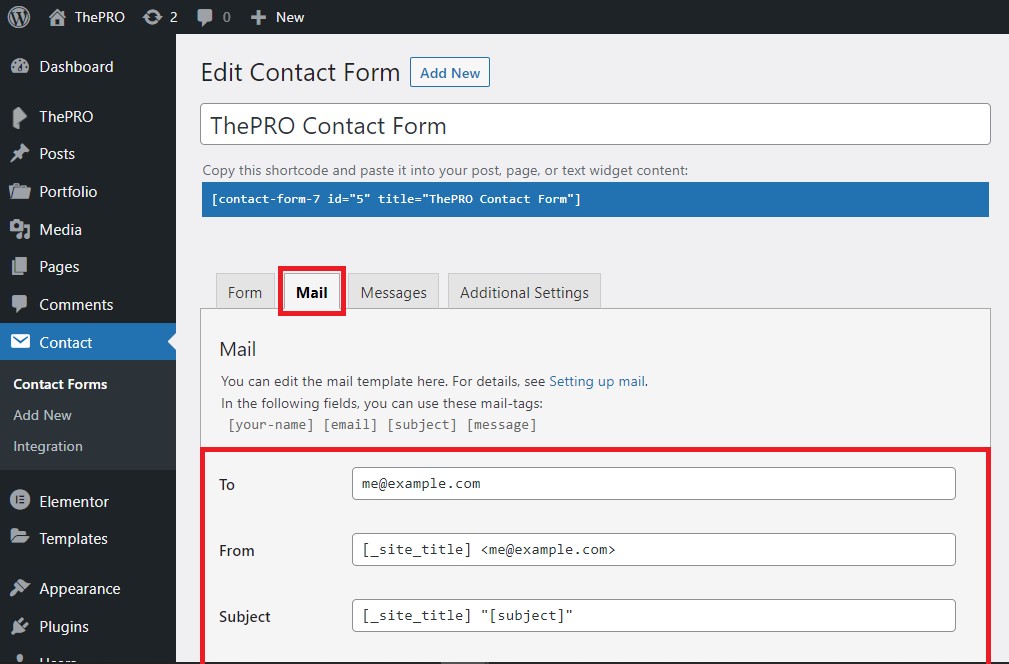
- Set the recipient email by replacing “[email protected]” with your email
For more information, please visit the official Contact Form 7 plugin documentation.
Translation
This theme is fully translation-ready and supports different translation methods depending on what you want to translate. You can translate built-in theme strings, create a multilingual website, and enable RTL (Right-to-Left) languages. Each method serves a different purpose and can be used independently or together.
Theme Translation
You can translate the default static strings that are built into the theme and cannot be changed in the text editor or website builders into your preferred language.
Examples include:
- Default text buttons (e.g. Read More, Load More)
- Default widget text
- Default titles
- Theme option labels and system notices
You can do this using the free Loco Translate plugin.
To translate the theme into your language, please follow these steps:
- Navigate to WordPress admin dashboard → Plugins → Add new
- Install and Activate Loco Translate Plugin
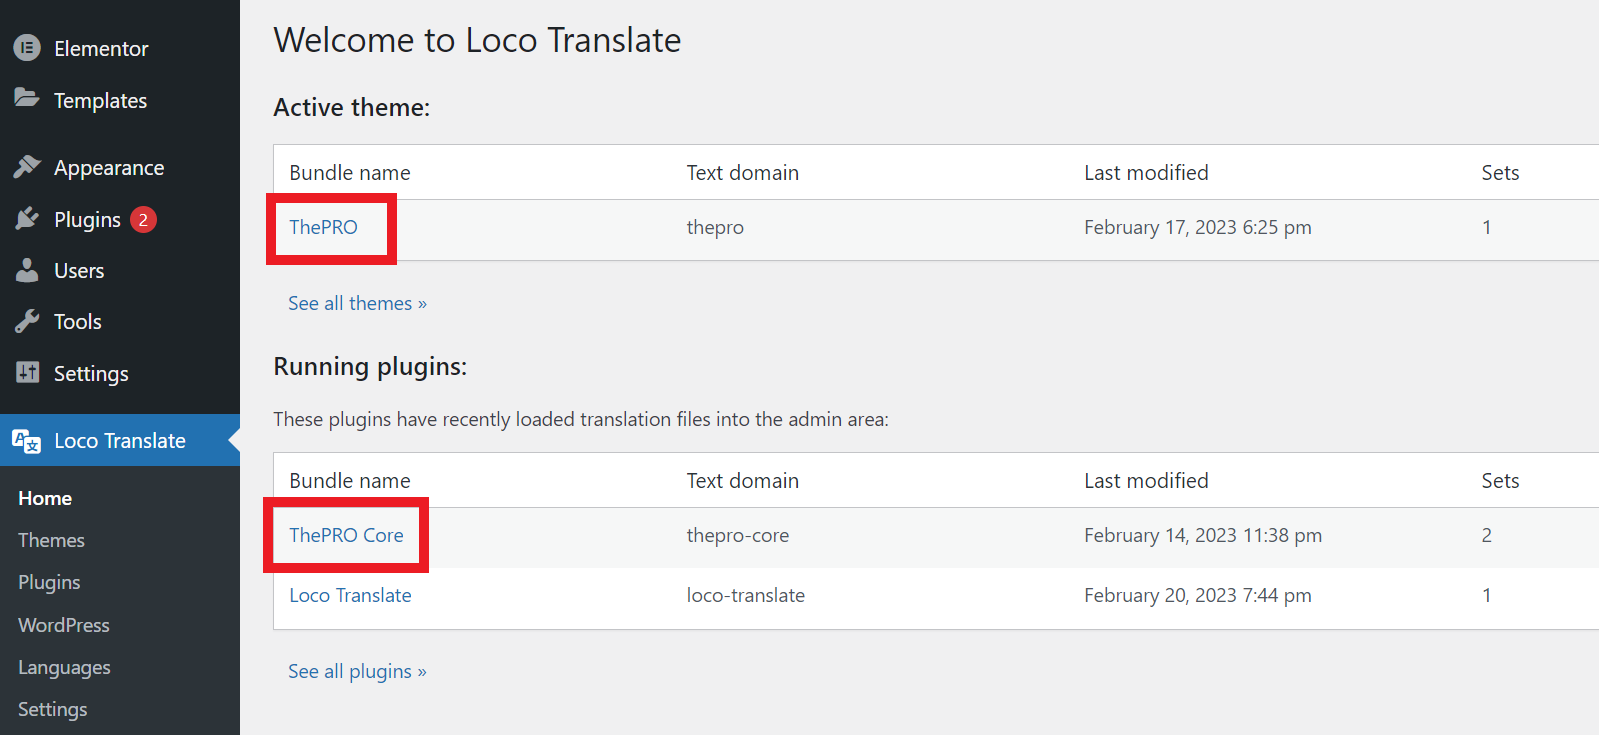
- Go to the Loco Translate plugin page, and click on the theme you want to translate (ThePRO).
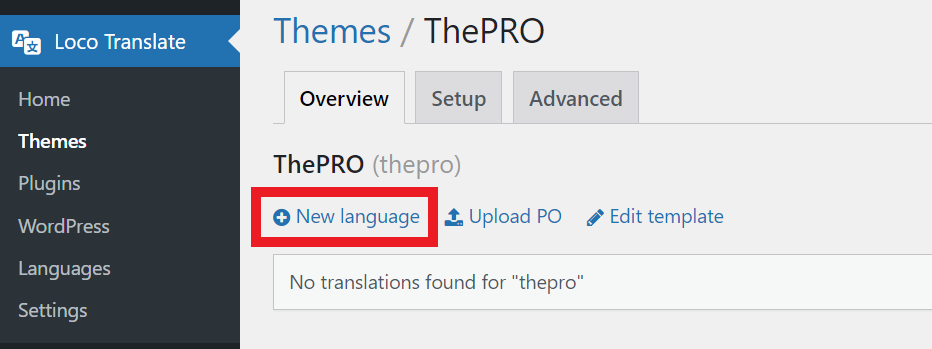
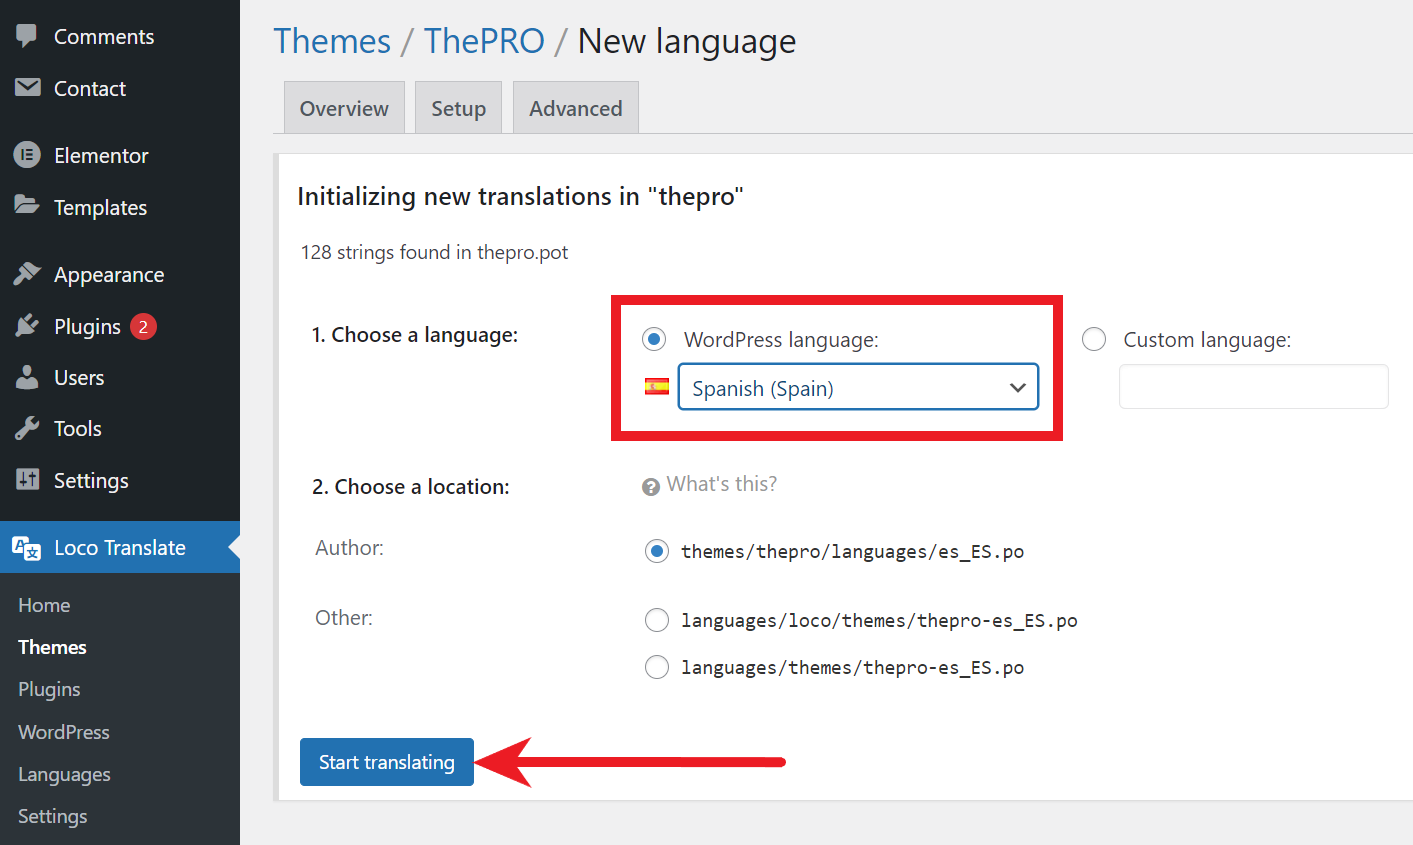
- After that, click on the New language button
- Select the language you want to translate to. And click on the “Start translating” button.
- Start translating strings. And click on the “Save” button.
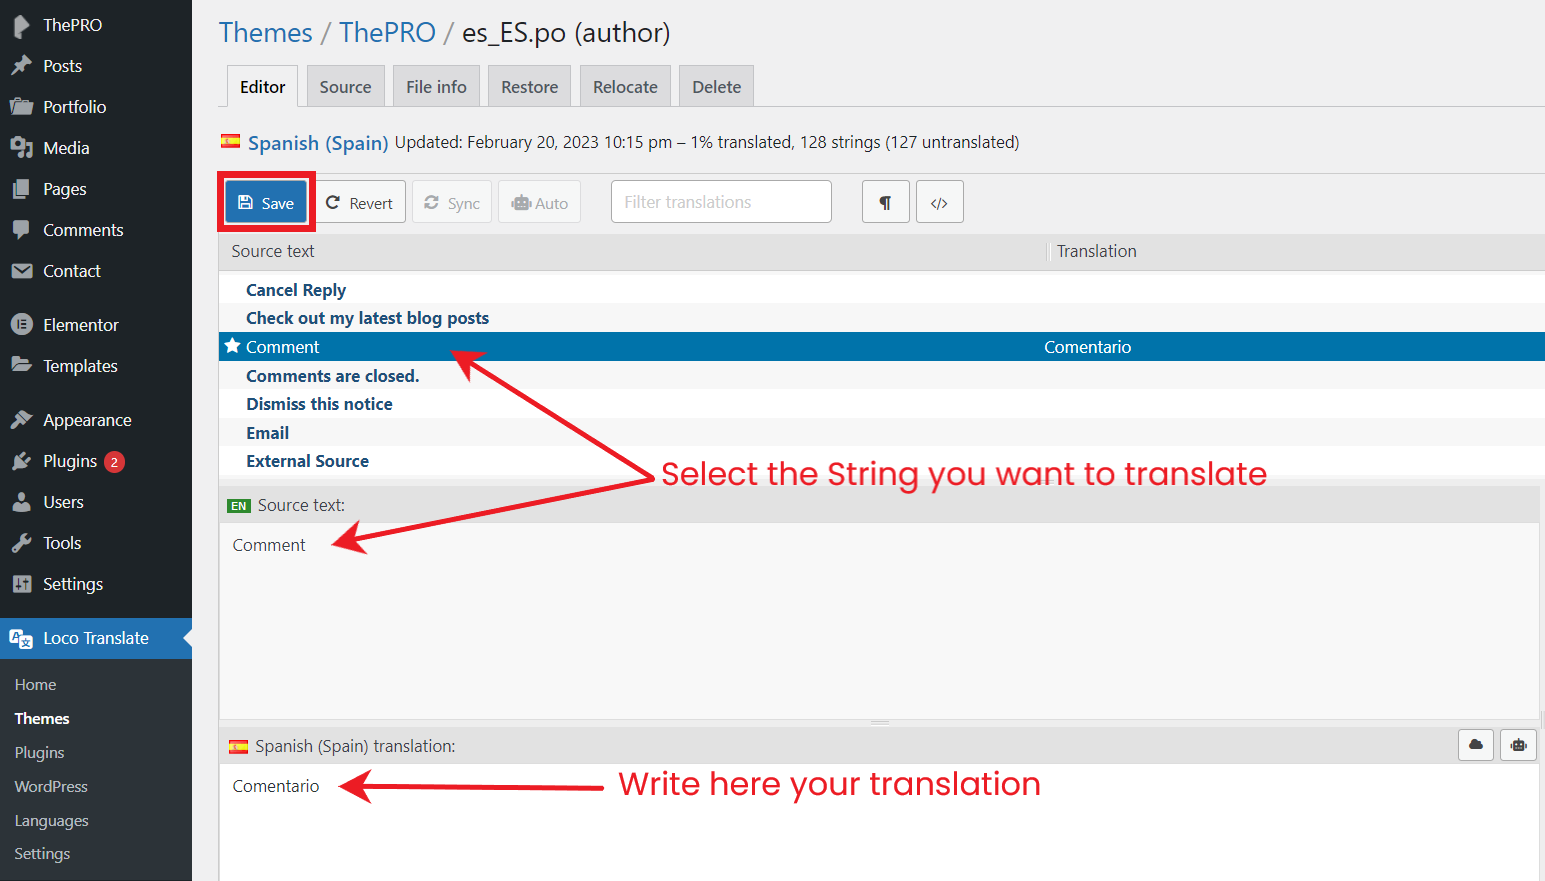
Repeat the same previous process to translate the ThePRO Core plugin.
For more information, please visit the official Loco Translate plugin documentation.
Theme Multilingual
You can translate the content that you create on your WordPress site (such as pages, posts, menus, custom content, etc) and create a multilingual website using one of the following:
1. Using Polylang Plugin (Free)
Polylang Plugin is a free plugin to create a bilingual or multilingual WordPress website. It is possible to add an unlimited number of languages and to translate the contents of your site either manually or with a complete translation management system.
Please visit the official Polylang plugin documentation for detailed guidance.
2. Using WPML Plugin (Paid)
Since ThePRO is WPML compatible theme, you can translate a template to a language of your choice. You will need to purchase a recent version of WPML, including the String Translation and Translation Management modules.
Follow the Getting Started Guide after installing the core WPML plugins.
To initiate translation, go to WPML > Theme and Plugin Localization. Click on Scan the theme for strings. You will see the theme strings and which ones are translated. Then select WPML > String translation and a list of the strings in the theme will be available. Choose the string you need to translate and select the translation link to add translations to languages.
RTL Theme
This theme includes built-in RTL (Right-to-Left) language support for languages such as Arabic, Hebrew, and Persian.
Enable RTL theme version
WordPress automatically detects whether your selected language uses a right-to-left (RTL) layout and adjusts the website display accordingly. To change your WordPress site language:
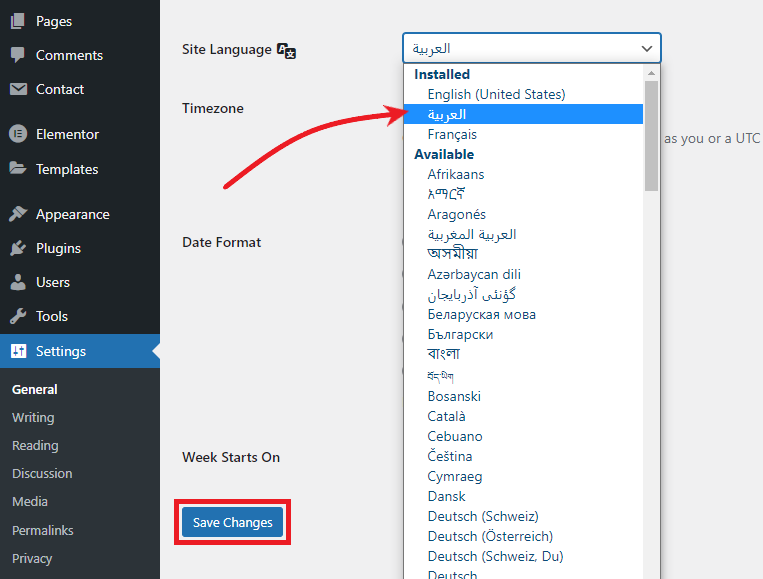
- Navigate to WordPress admin dashboard → Settings → General
- Find the Site Language dropdown menu.
- Select an RTL language, such as Arabic, Hebrew, or Persian.
- Scroll down and click Save Changes. Then you’re all done!
Keeping the WordPress dashboard in English
If you want to use the RTL version of the theme while keeping the WordPress dashboard in English:
- Navigate to WordPress admin dashboard → Users → Profile
- Find the Language dropdown menu.
- Set the Language option to English.